
An Amateur’s Guide to Sourdough Starter
When I say amateur, the amateur is me. I am Alex the amateur.
Dear friends,
I had never baked bread before this year. Not even the commercial yeasted kind. So, when I started to seek solace into sourdough this year, I remember that I desperately wanted some comprehensive starter guide--one that made no assumptions about my bread knowledge. (My mother always says once you assume, you make an “ass” out of “u” and “me.”)
There are thousands of guides out there, and I remember becoming quickly overwhelmed. Each baker touts his or her own method. While these bakers ground their techniques in years of experiences, sometimes their expert knowledge forgets that their reader has zero. I hope this guide will be helpful to you. As I’m only nine months (~30-40 loaves) in my own baking journey, I still remember the anxiety of my first loaf. I’ve never considered myself a baker: I hate precision and directions. So, these pangs of anxiety still wrack me each night before I bake. I’m still learning, and I’m excited to turn my solo journey into a shared one.
I hope you find this guide as an encouraging starter (!) kit of tips and recommendations from a good friend…well...
ur friend,
Alex
Guide Directory
There’s a lot of bread making equipment. What should I invest in?
What sourdough recipe should I follow first? ? (and other resources)
I’m done baking until next week. What do I with my starter now?
What is a sourdough starter?
John Dough, himself!
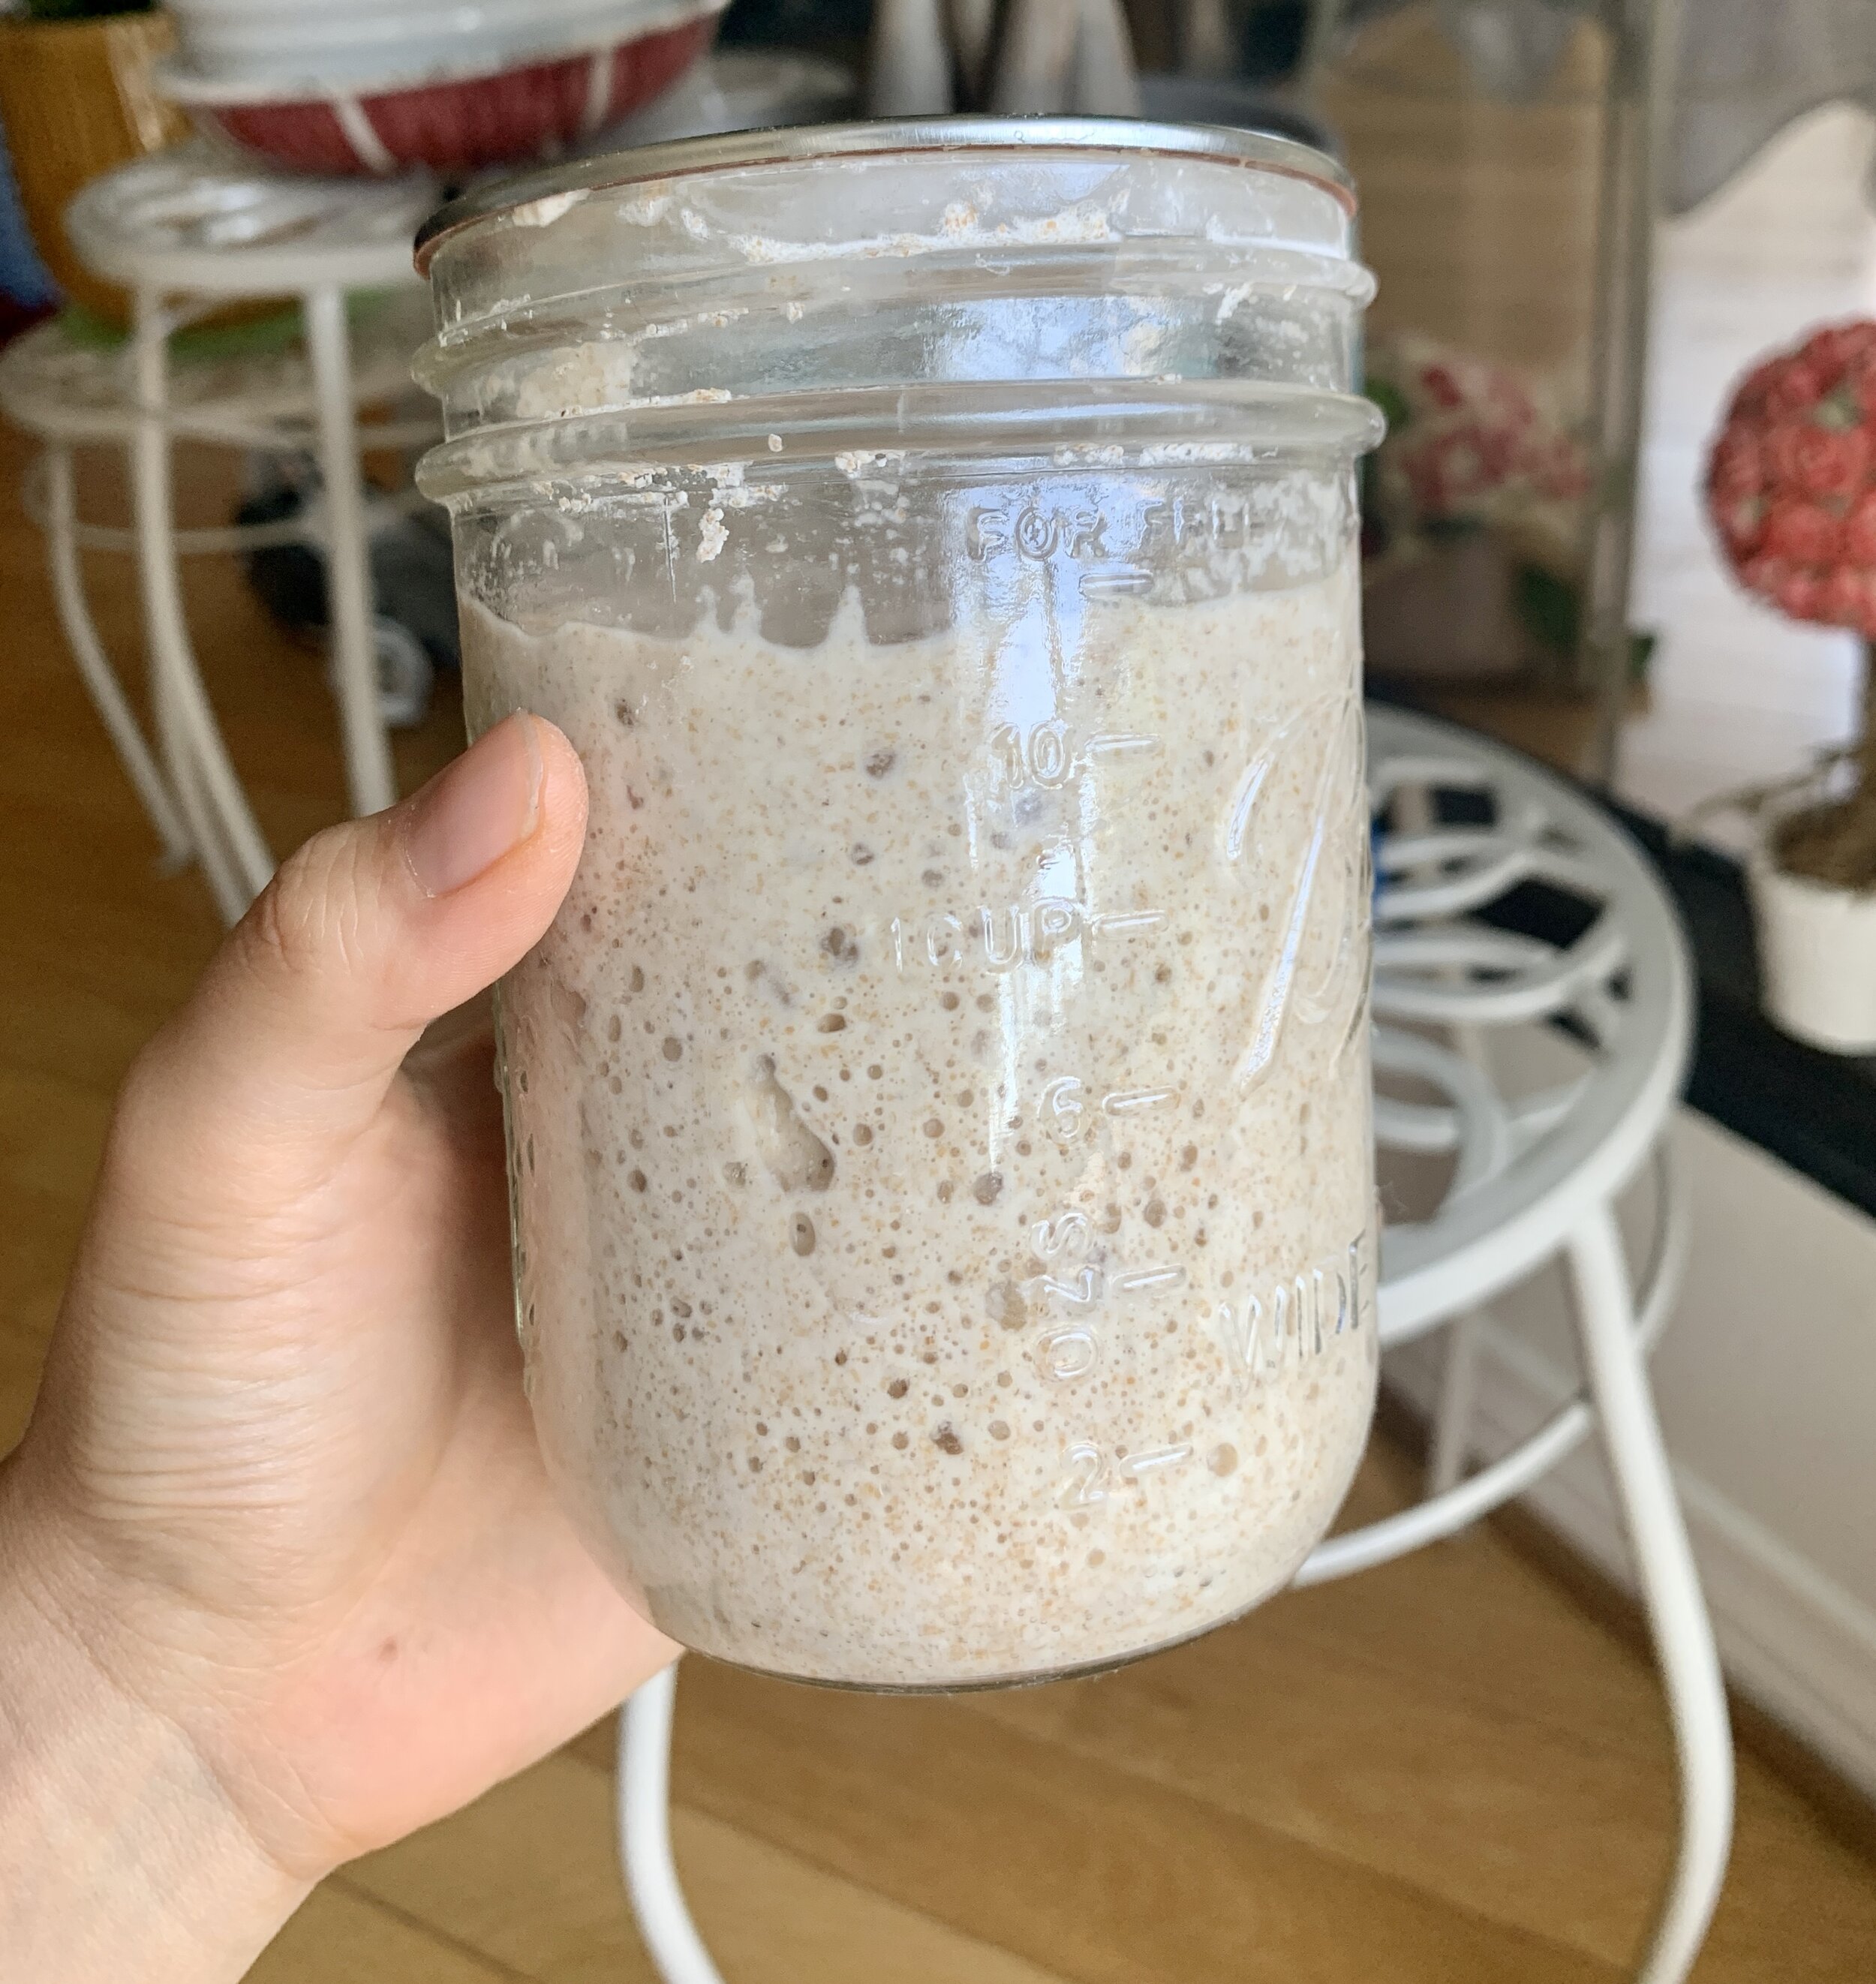
Sourdough starter is made simply from water and flour. After you repeatedly feed the starter, discard ~90% of it, and carry over ~10% of it once a day, you’ll begin to grow an active culture. After 10-14 days, a natural culture of bacteria and yeasts that origin directly from the flour will grow. When you bake with sourdough starter, you do not need any commercial yeast. The starter takes its place, rising the bread and adding a tang.
Starters normally contain equal parts flour to water (100% hydration). (What is hydration? We’ll get to that now.)
Vocabulary:
Percentages -- the ratio of ____:flour.
Ex. Hydration percentage -- the ratio of water:flour
Hydration can be used to describe both the starter and bread. Starters are normally fed a 1:1 ratio of water:flour, or 100% hydration. Loaves can range in hydration but most country loaves are 70-85%, or 700g water: 1000g flour-850g water: 1000g flour.
Ex. Let’s break down this bread recipe. A loaf of sourdough is usually 1 kg (1000g).
70% bread flour, 30% whole wheat, 75% hydration, 2% salt
700 g bread flour, 300g whole wheat flour, 750g water, 20g salt
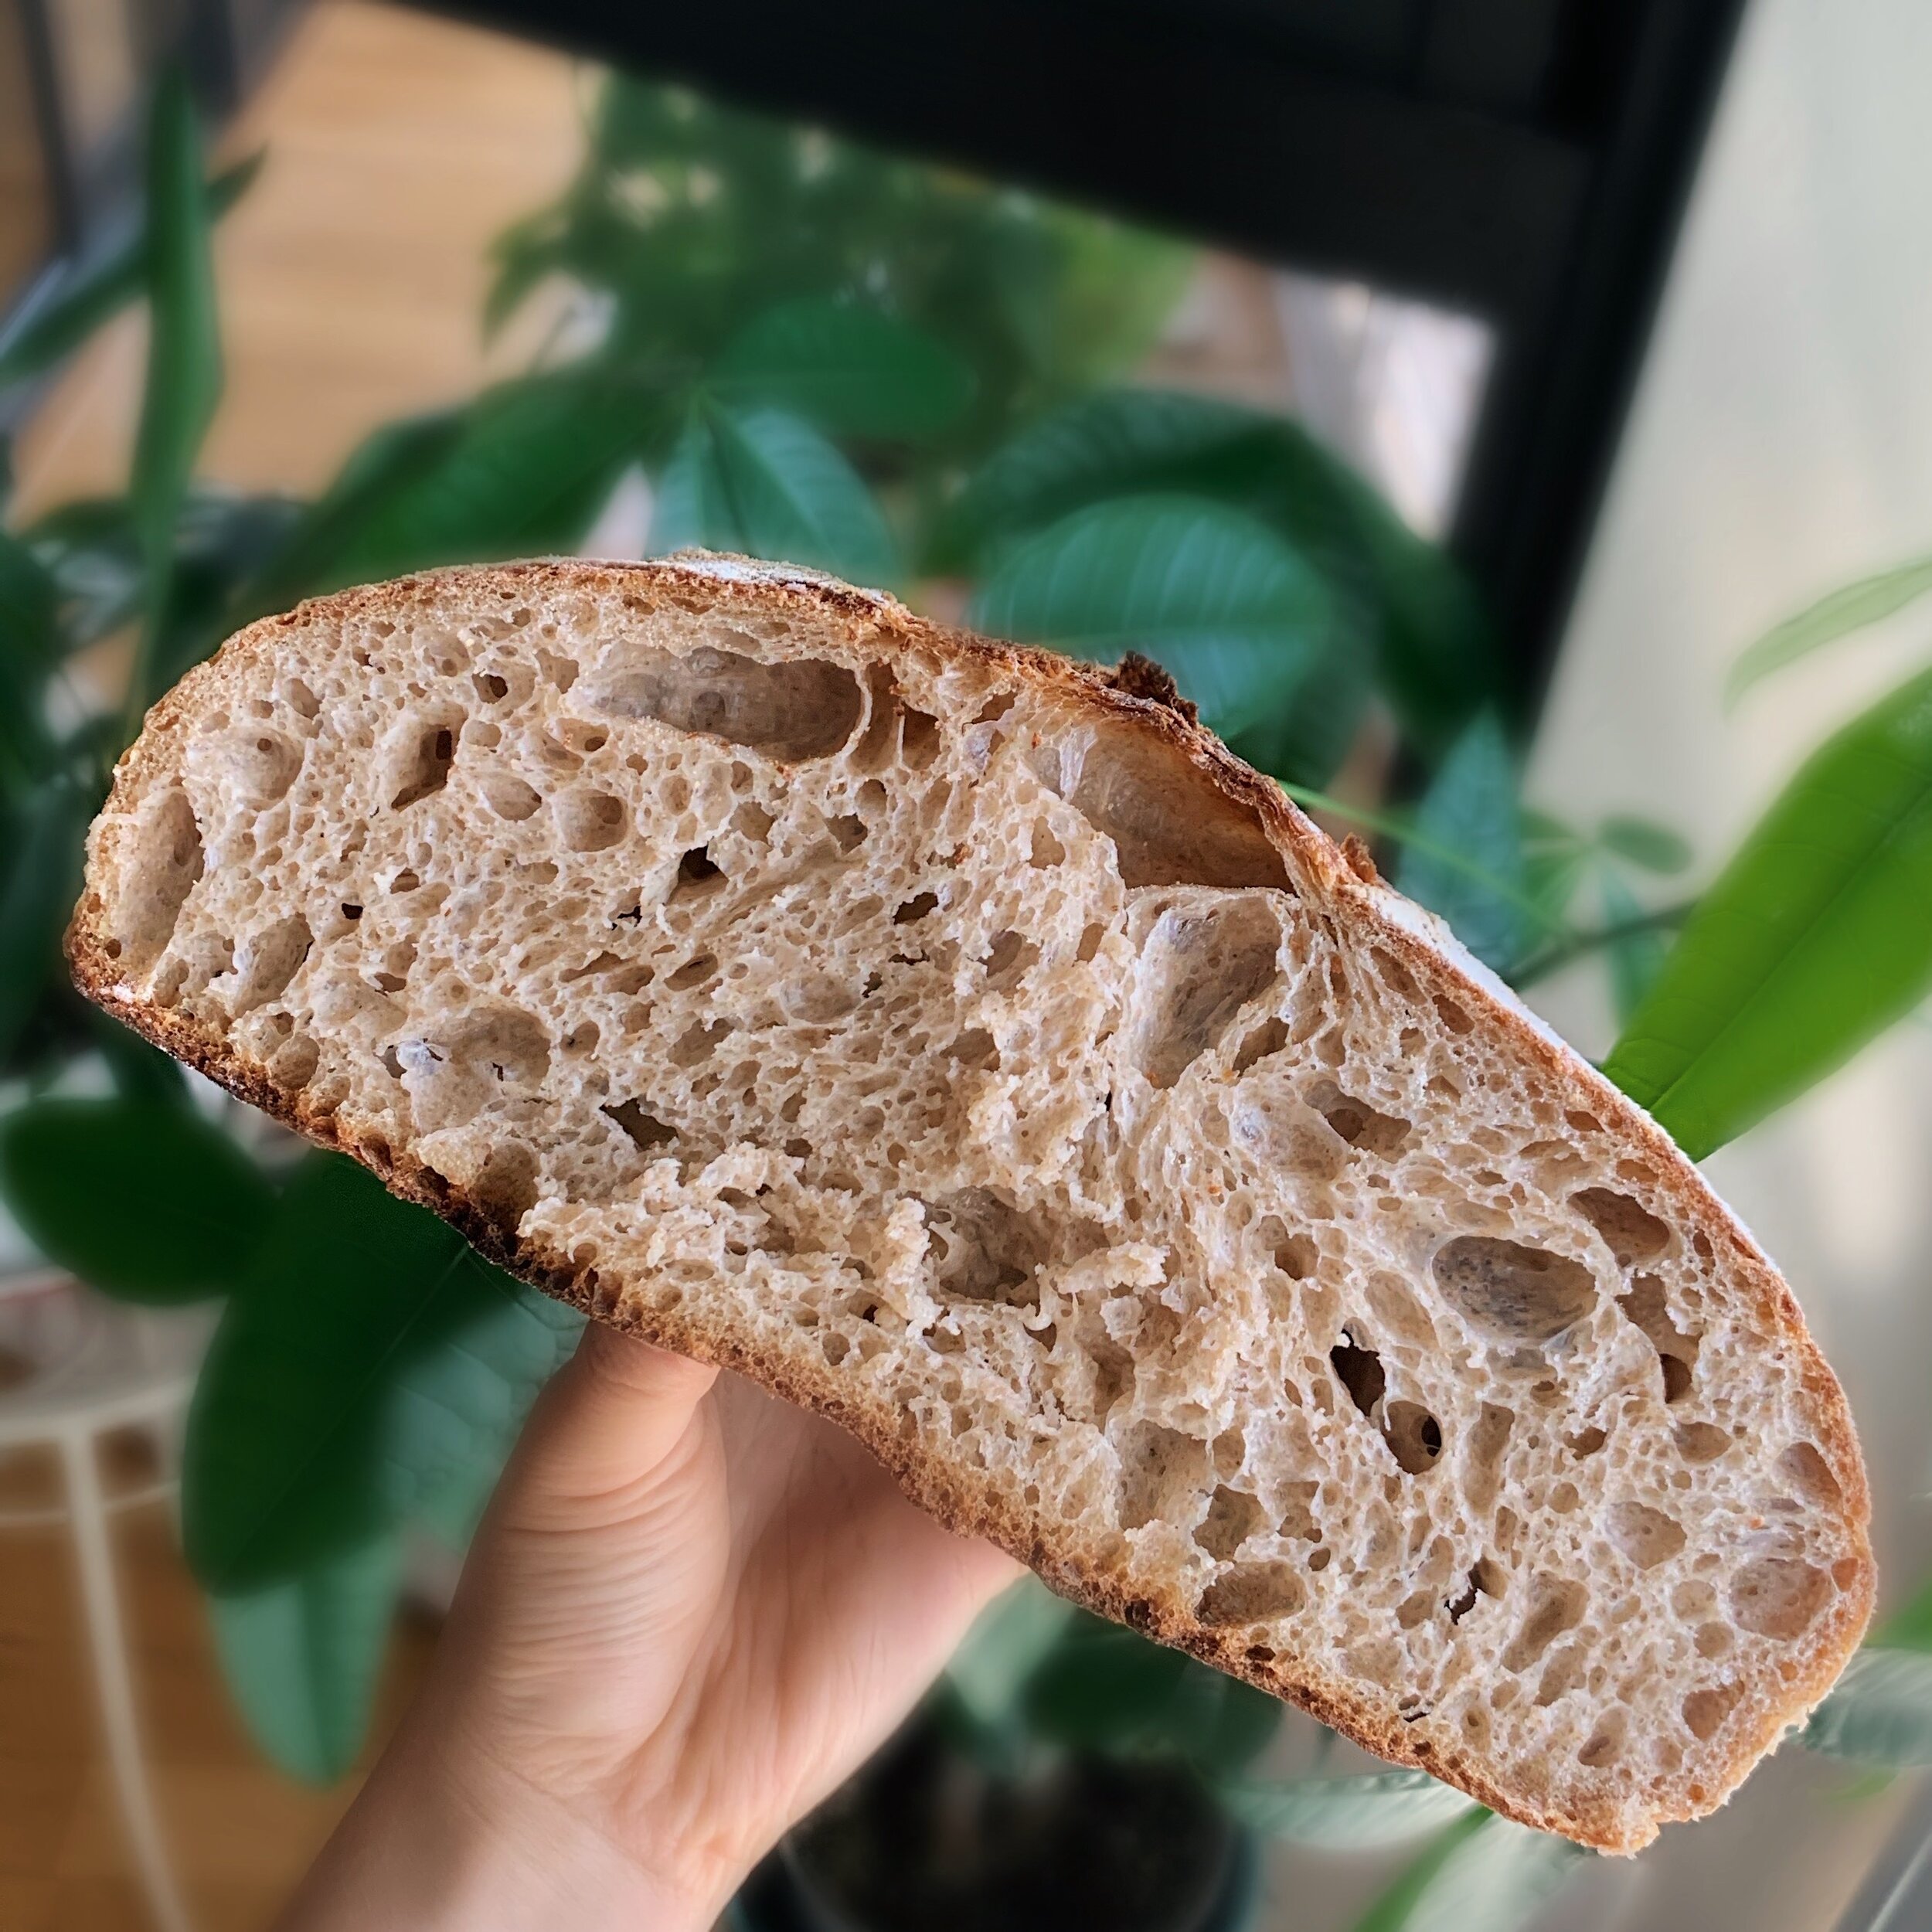
Crumb -- the internal structure of the bread after it has been baked
Open crumb - evenly distributed, big holes, taller rise (height). Usually with more white flour and/or higher hydration. Because white flour does not absorb as much water as whole grain flour, dough with more white flour and higher hydration is usually stickier/harder to handle.
Closed crumb - evenly distributed, small holes, shorter rise (height). Usually with more whole grain flours and/or lower hydration. Because whole grain flour is heavier (contains more of the grain’s nutrients), the bread will not rise as high. Lower hydration will not create as much steam during baking, leading to shorter breads.
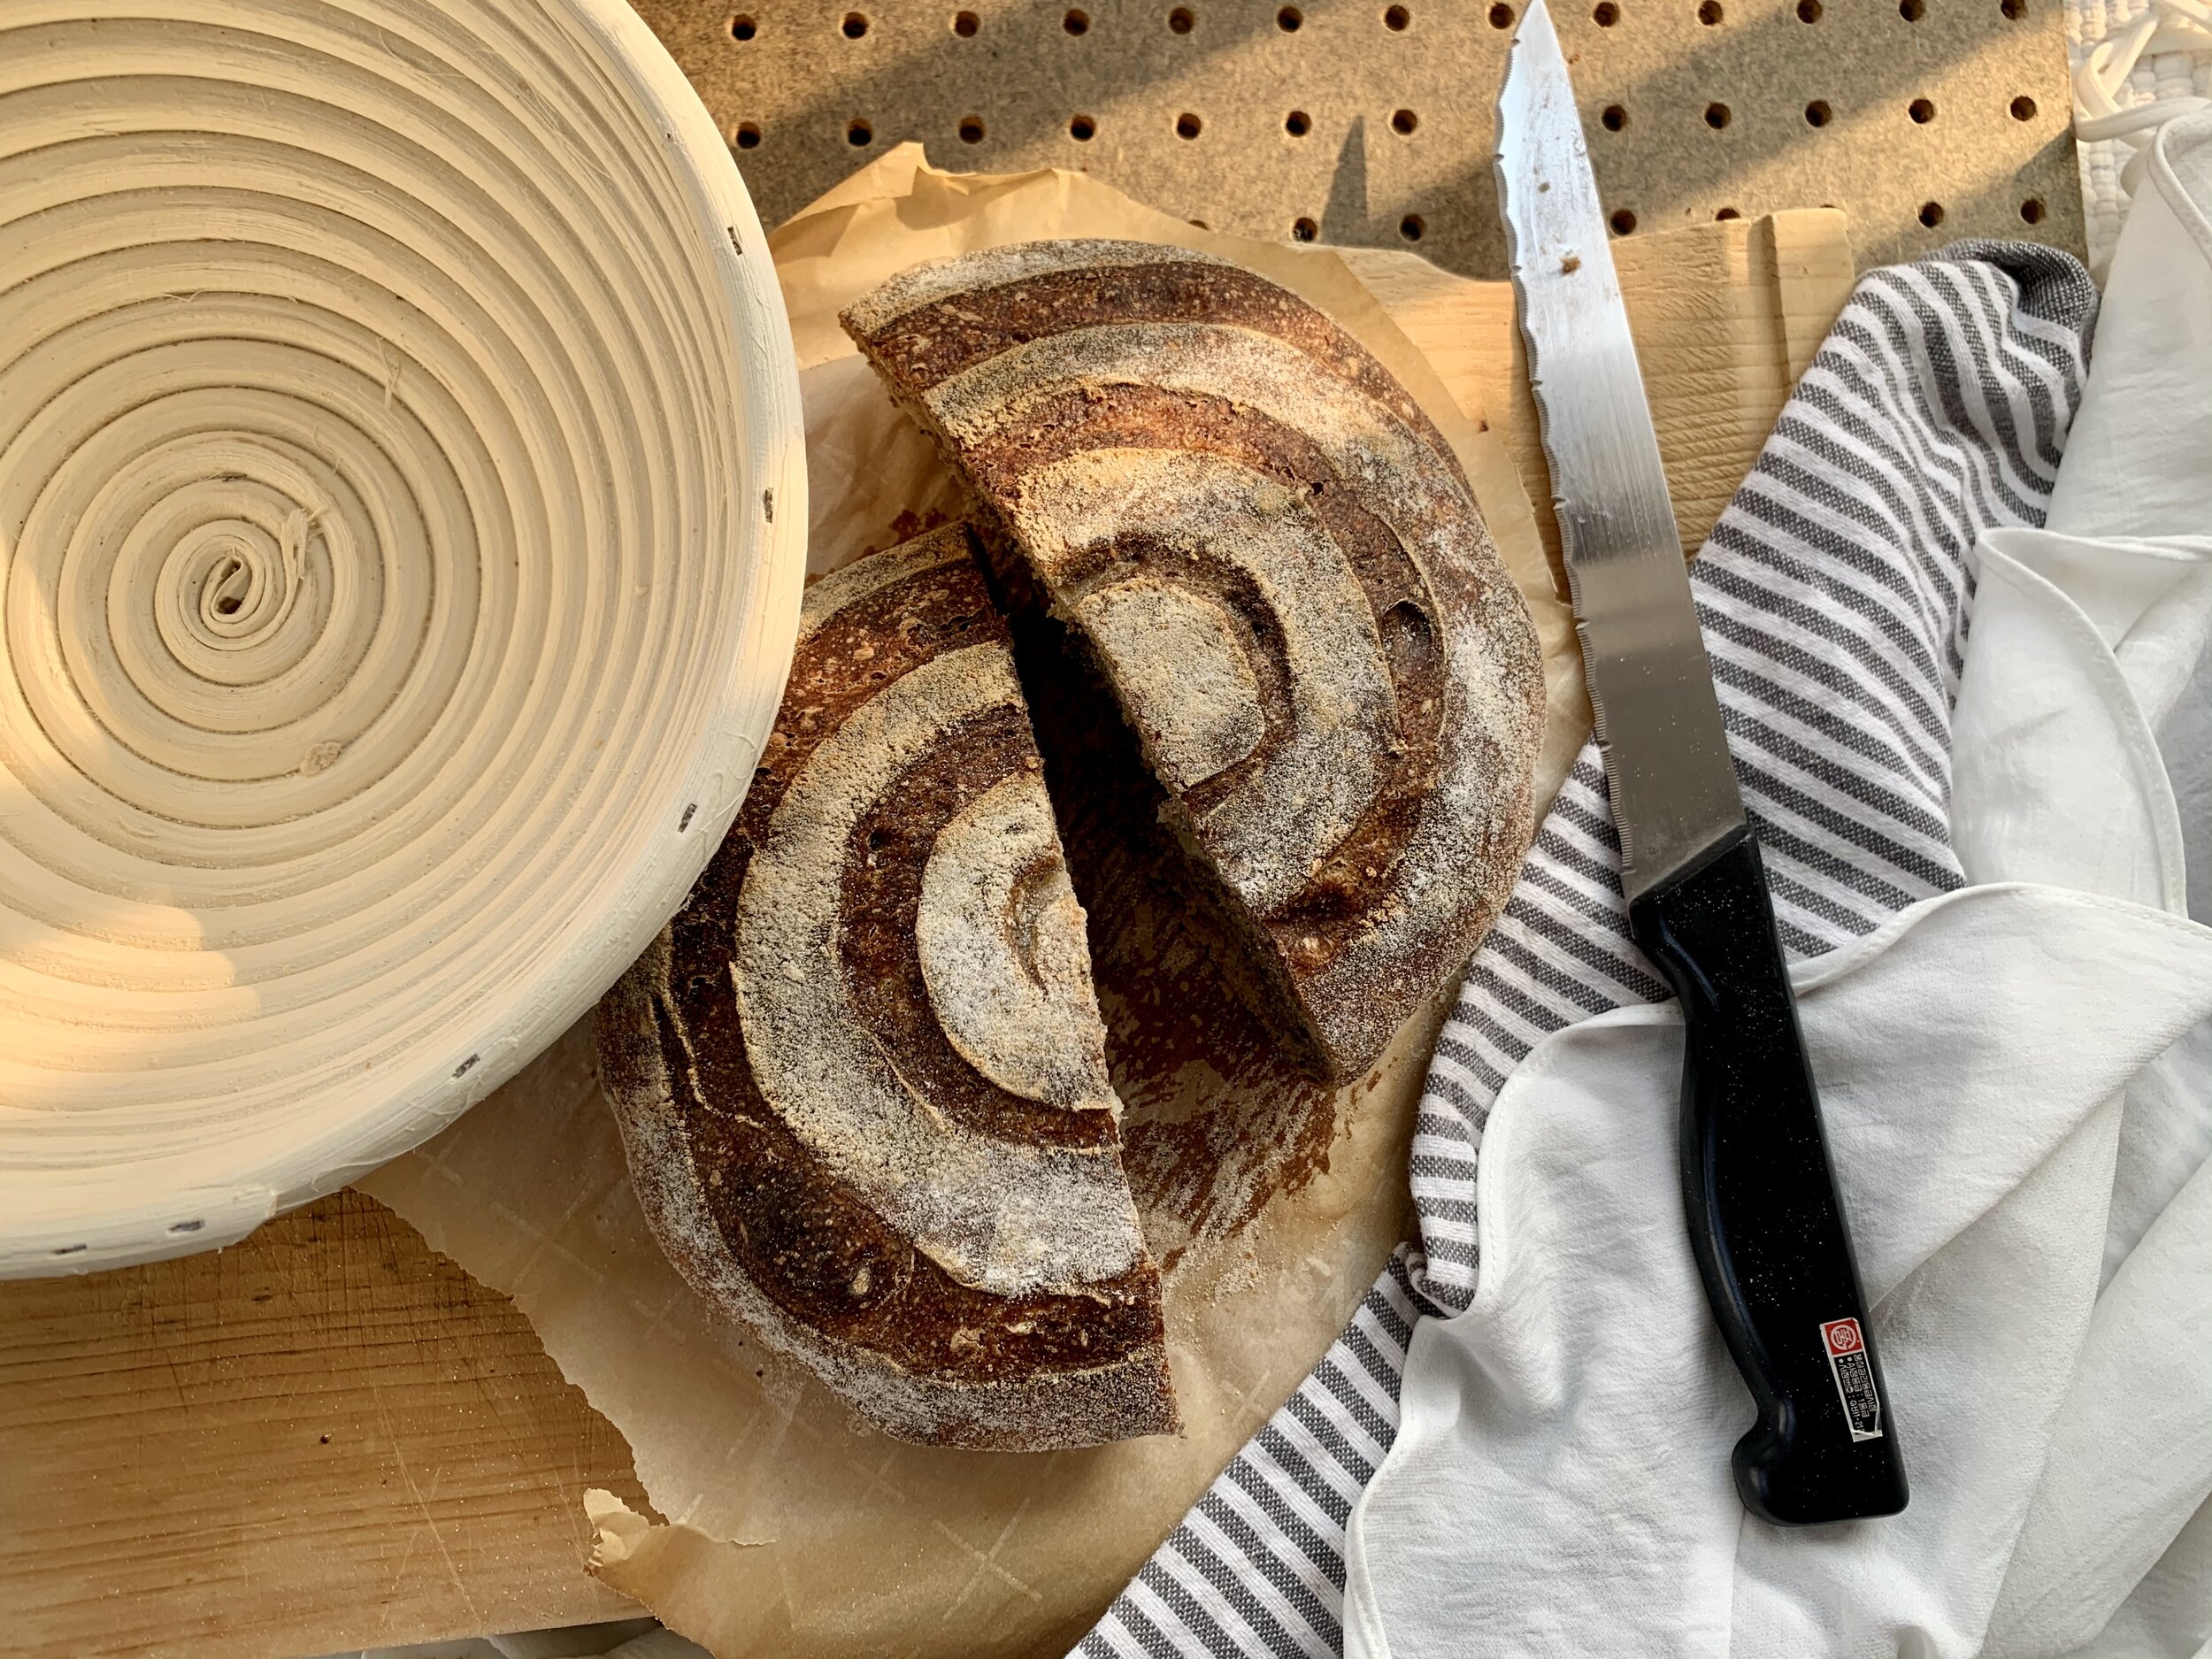
Why is everyone obsessed with crumb? Bakers love to talk and analyze crumb because there’s so many additional variables, other than hydration and flour type, that can affect your crumb (i.e., underproofed, overproofed, shaping, scoring, ovenspring, etc.) But in the end, all that really matters to me is if the holes are evenly distributed.
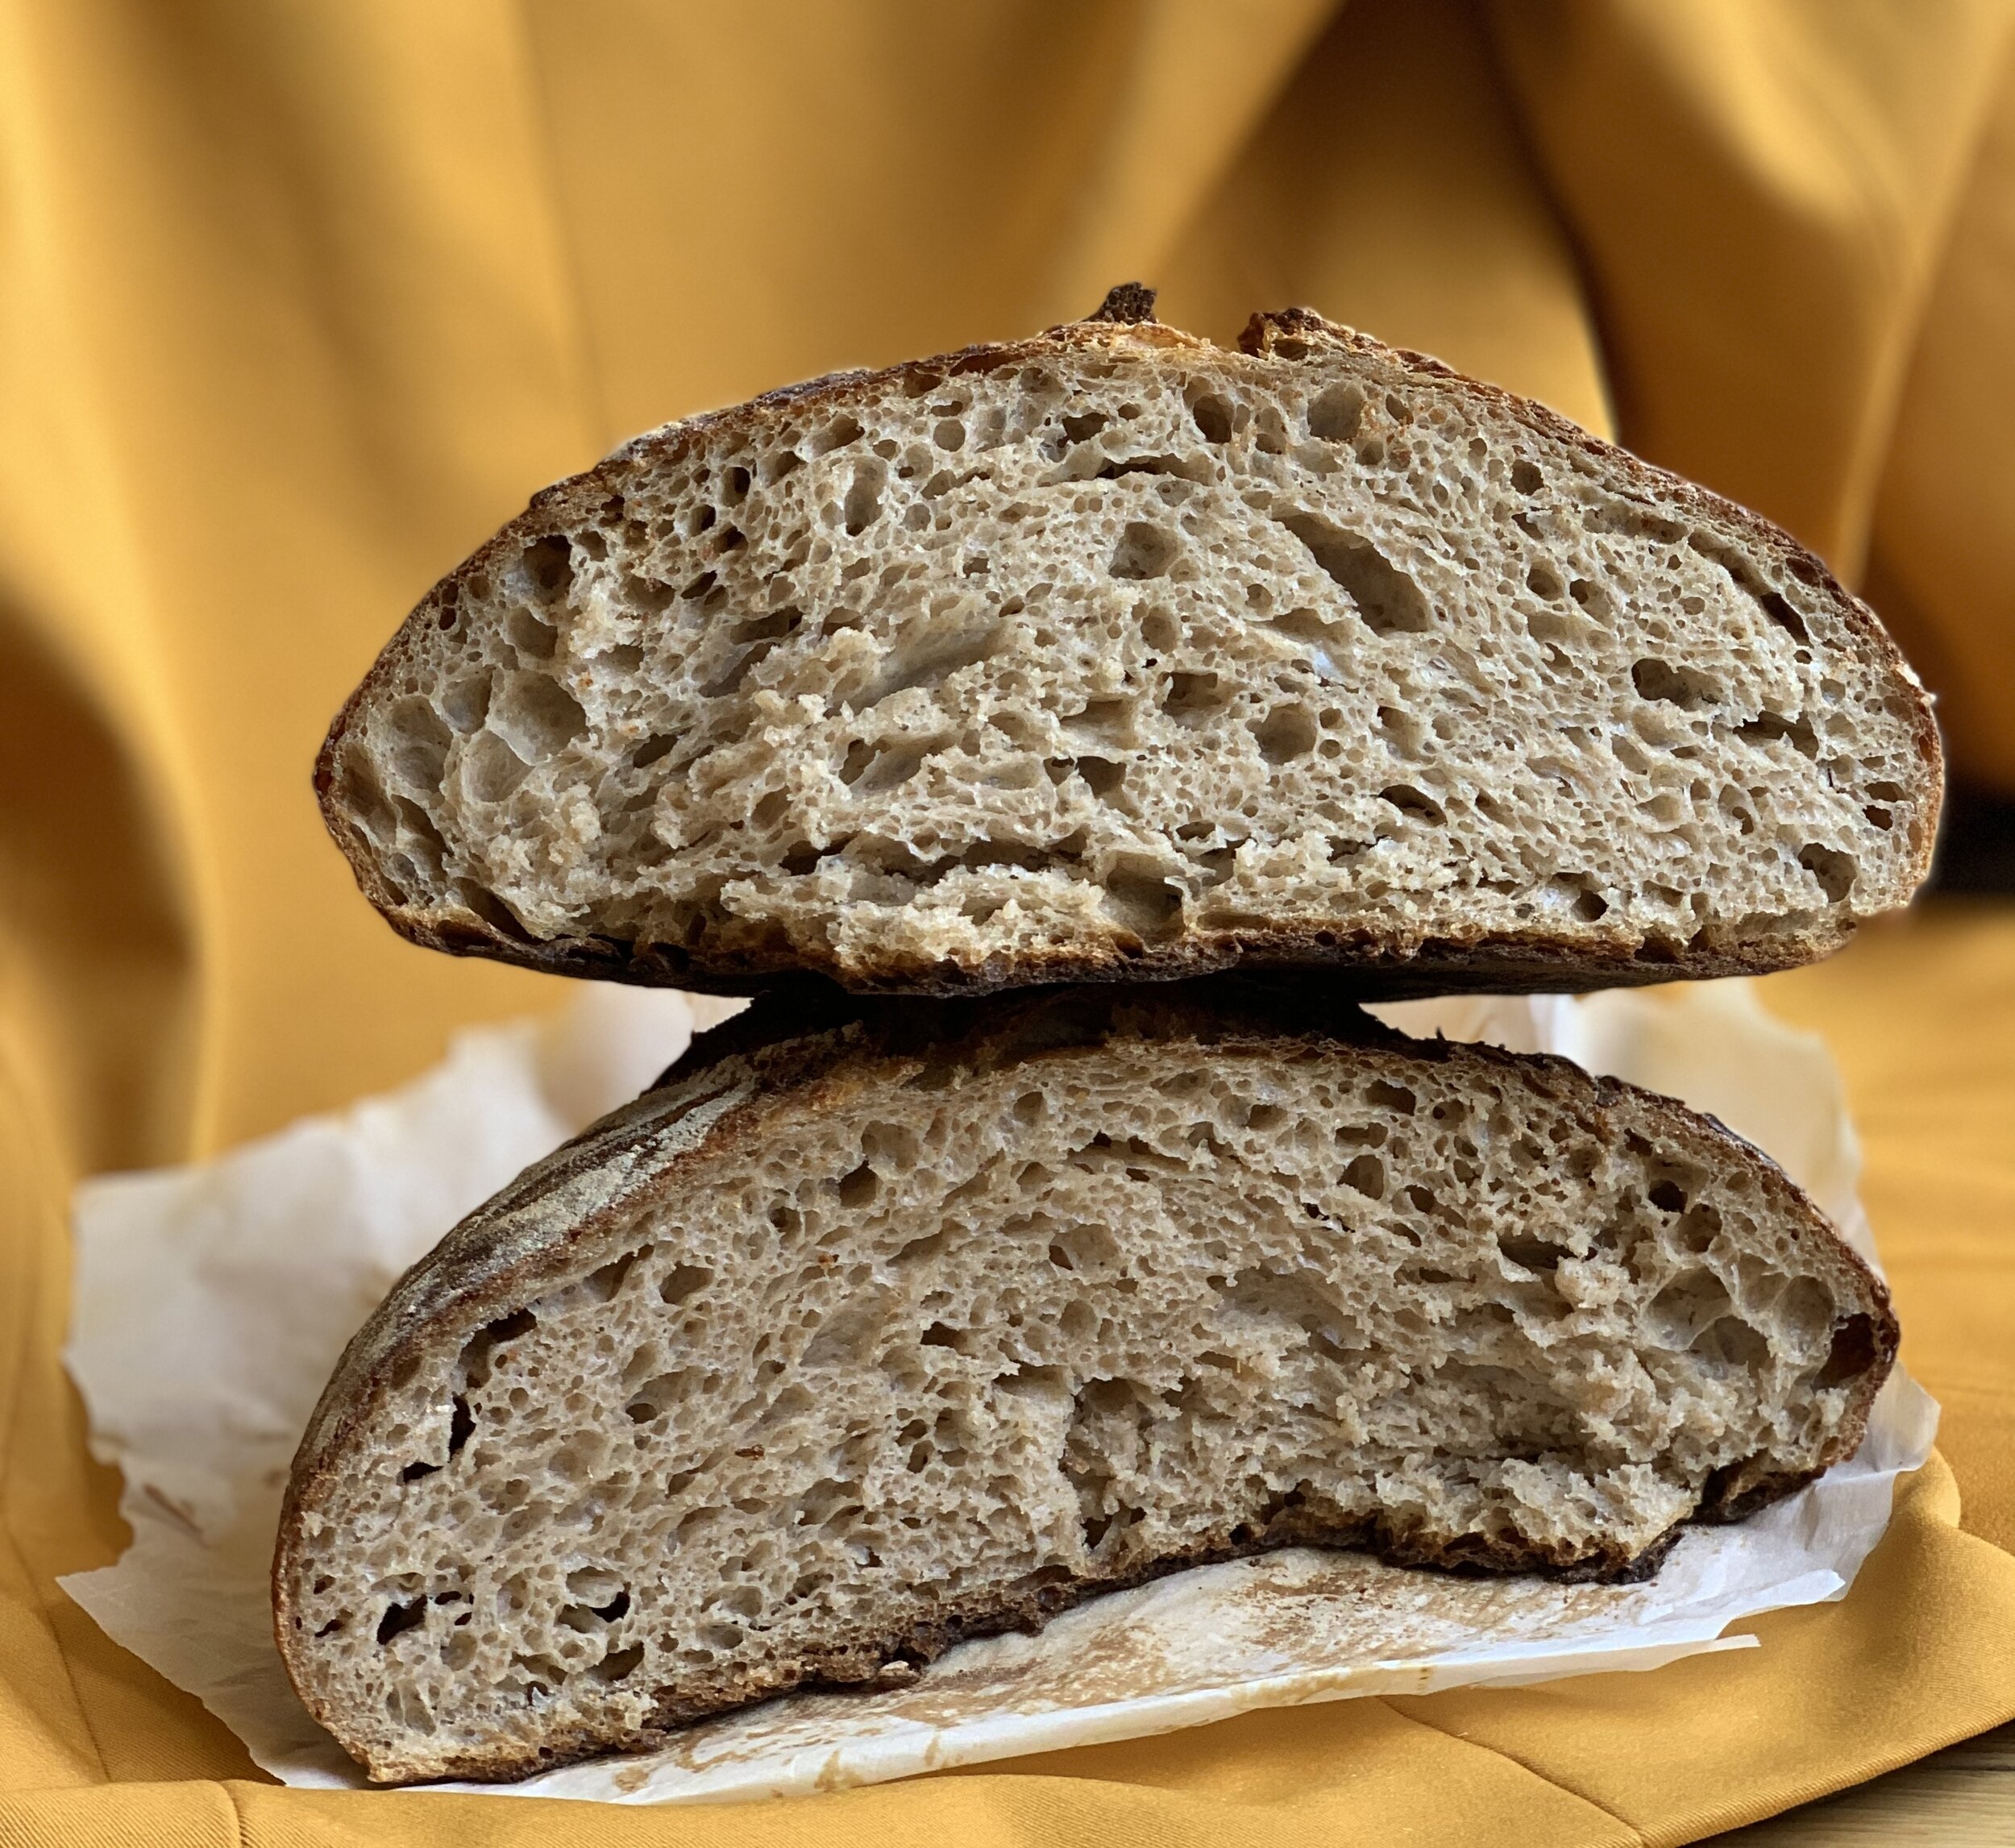
6 different breads, 6 different crumbs:
my 1st loaf! — totally uneven crumb, large gaping holes, not good rise (I used AP flour, not bread flour). i was really frazzled during this process. watch here. (30% ww)
my 2nd loaf — huge improvement. i think this is one of my most even crumbs to date. i remember strictly following claire safftiz’ nytcooking guide this time. (30% ww)
3 months - i started experimenting with rye flour, adding 10% rye. since dark rye is an especially heavy/water-loving flour, the crumb is slighly more closed as expected. you can tell that this loaf is slightly overproofed: the holes are not open but they look fallen/closed. the holes deflated before they got to the oven.
what happened between months 3 and 6? i got bored with 30% whole grain and 70% bread flour, and i started really experimenting with crazy combinations, scoring, and specialty whole grains . i also started branching out from the nytcooking guide, deciphering instagram caption recipes and and using The Perfect Loaf recipes. i had a lot of failures, and looking back, i should have just continued to hone my techniques with the basics.
6 months - i finally felt comfortable enough coming up with my own zany sourdough mix-ins. this loaf is a buckwheat and spelt marbled loaf—a lot higher than 30% in whole grain. i think it’s a great example of what happens when you start to add mix-ins. the darker layer has a much more closed crumb because mix-ins impede rise. the lighter layer has larger holes. (you can also see a banneton in the background. i think this is when i finally bought real bread proofing baskets.)
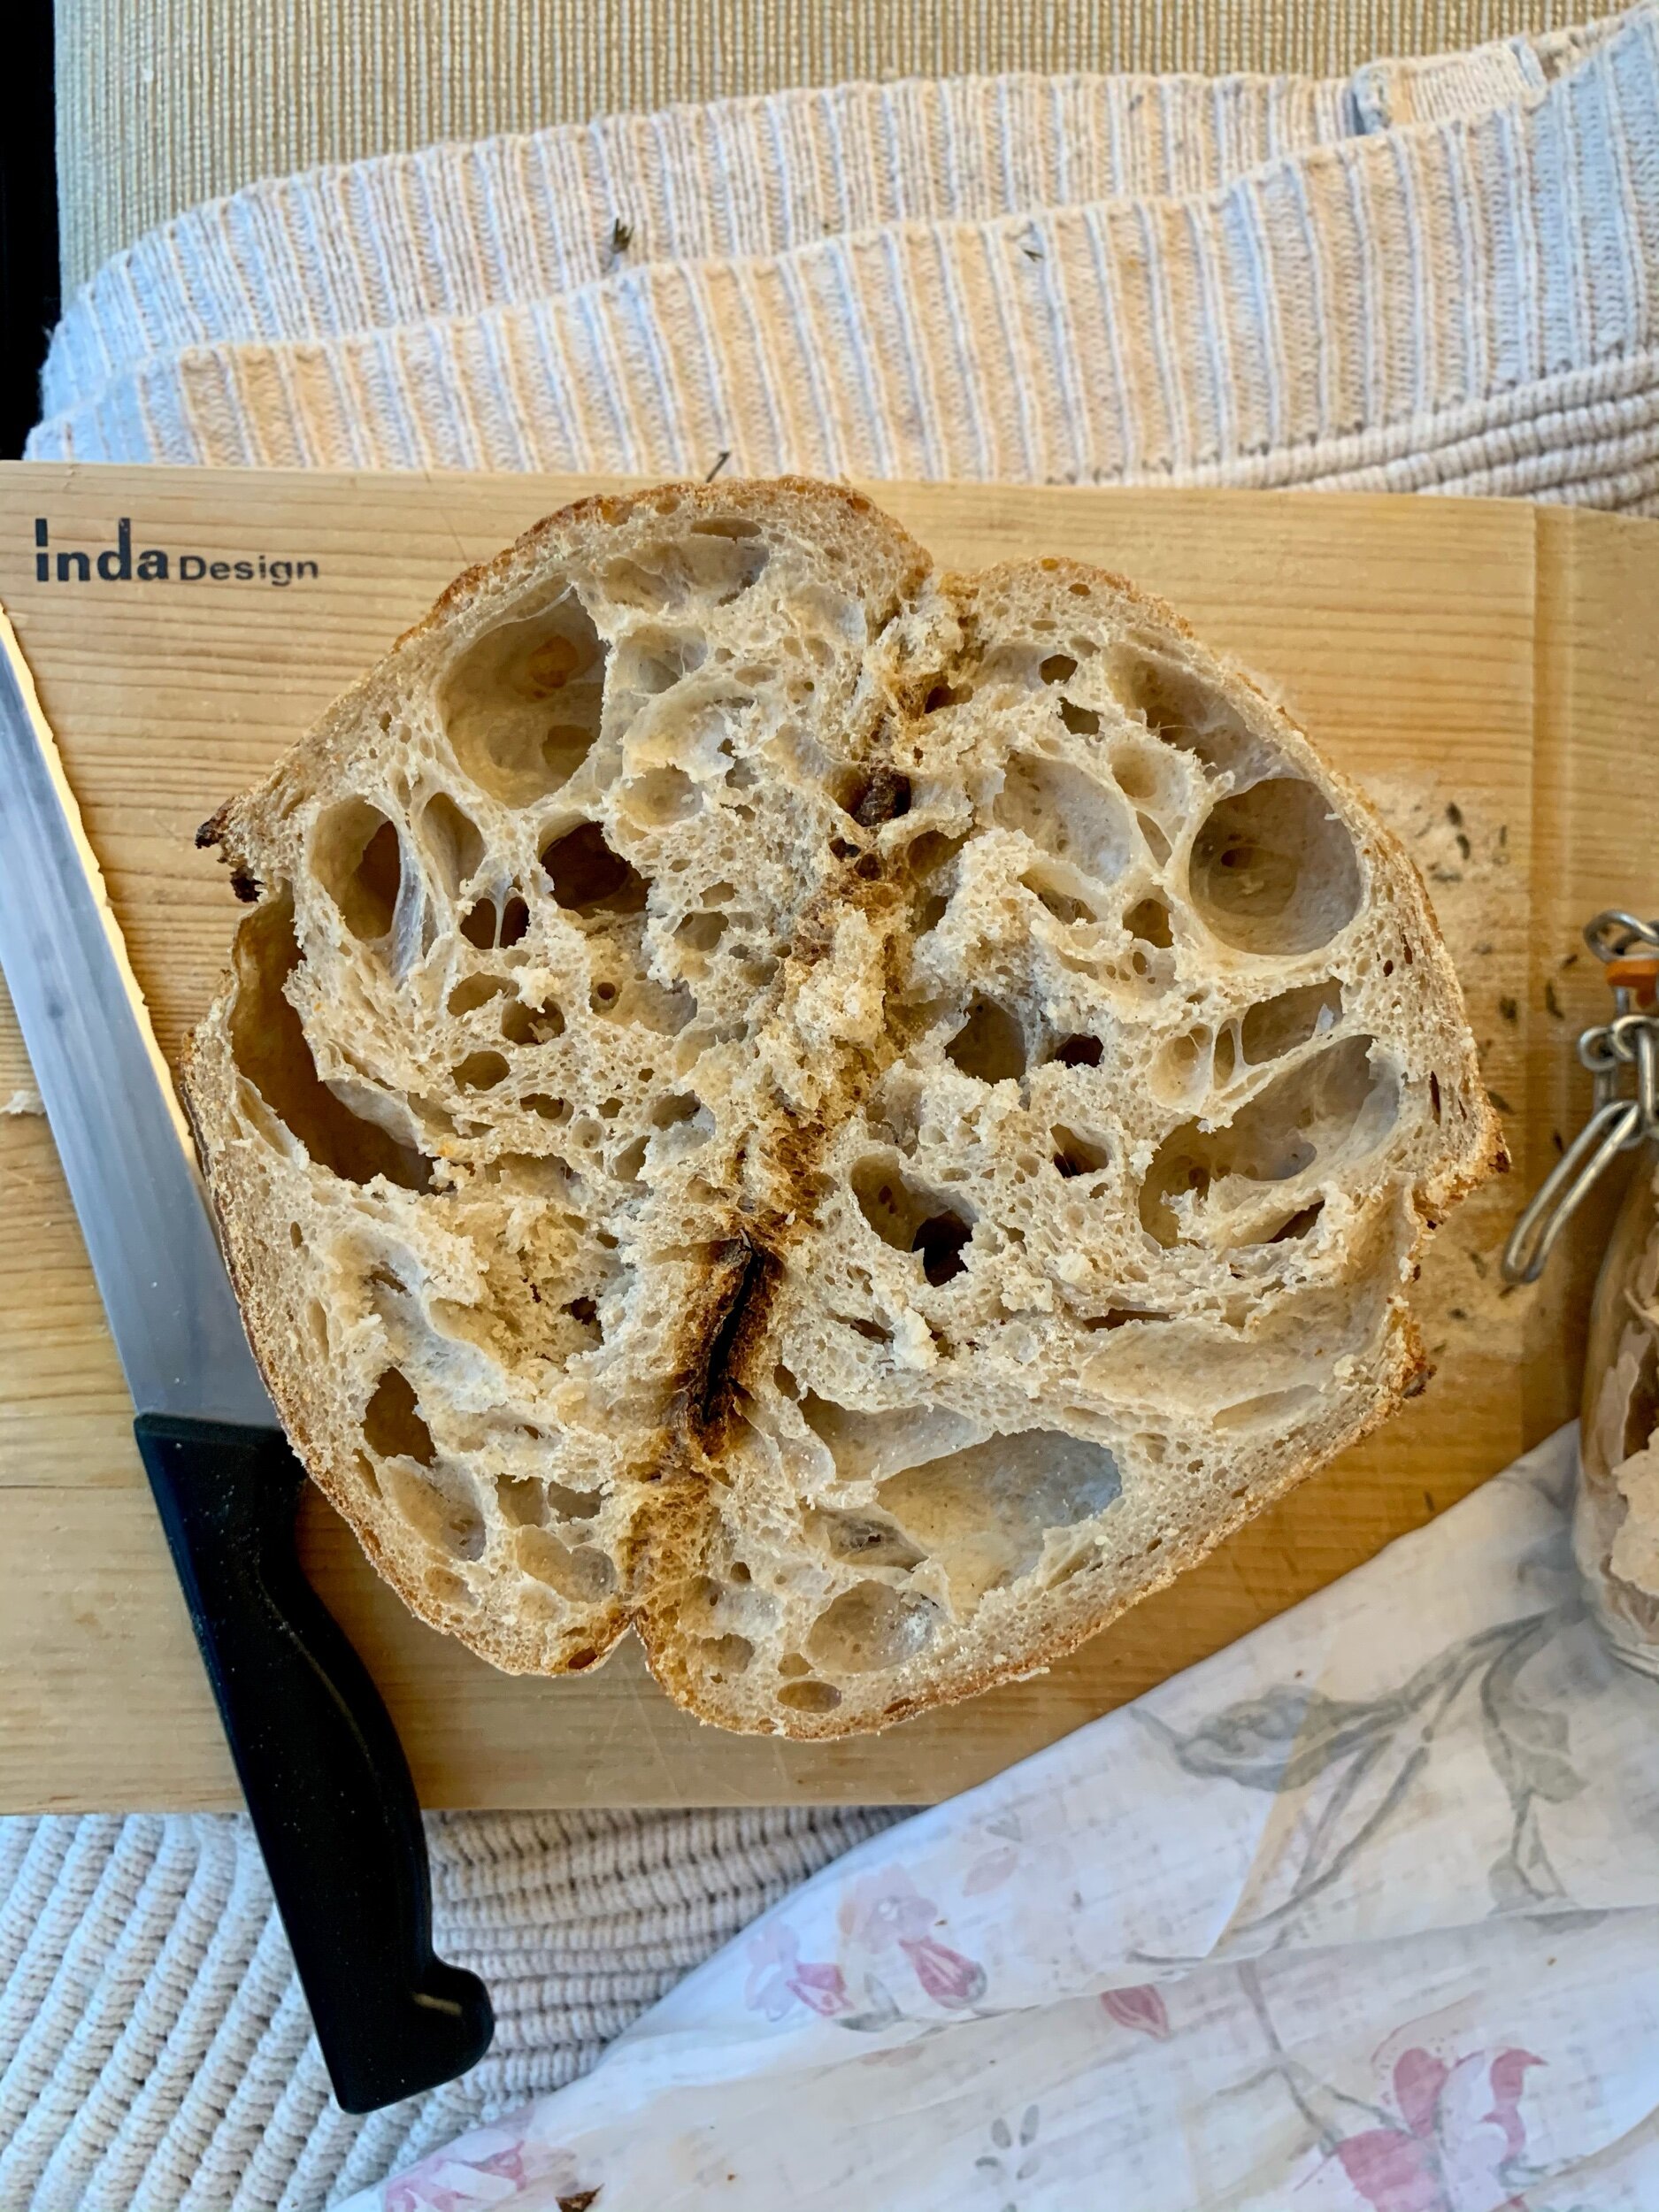
7 months - i finally branched out into shaping my bread into batards (oval shape) instead of boules (round shape). batards will naturally be taller than boules because the diameter is smaller. i started using a slap-and-fold technique here instead of claire’s 10 minute mixing period after combining autolyse and starter, and i went back to 30% whole grain: the crumb is quite even here—although there is an errant tunnel on the side closest to the camera—a sign from an ambitious scoring pattern (that probably did not let steam escape evenly).
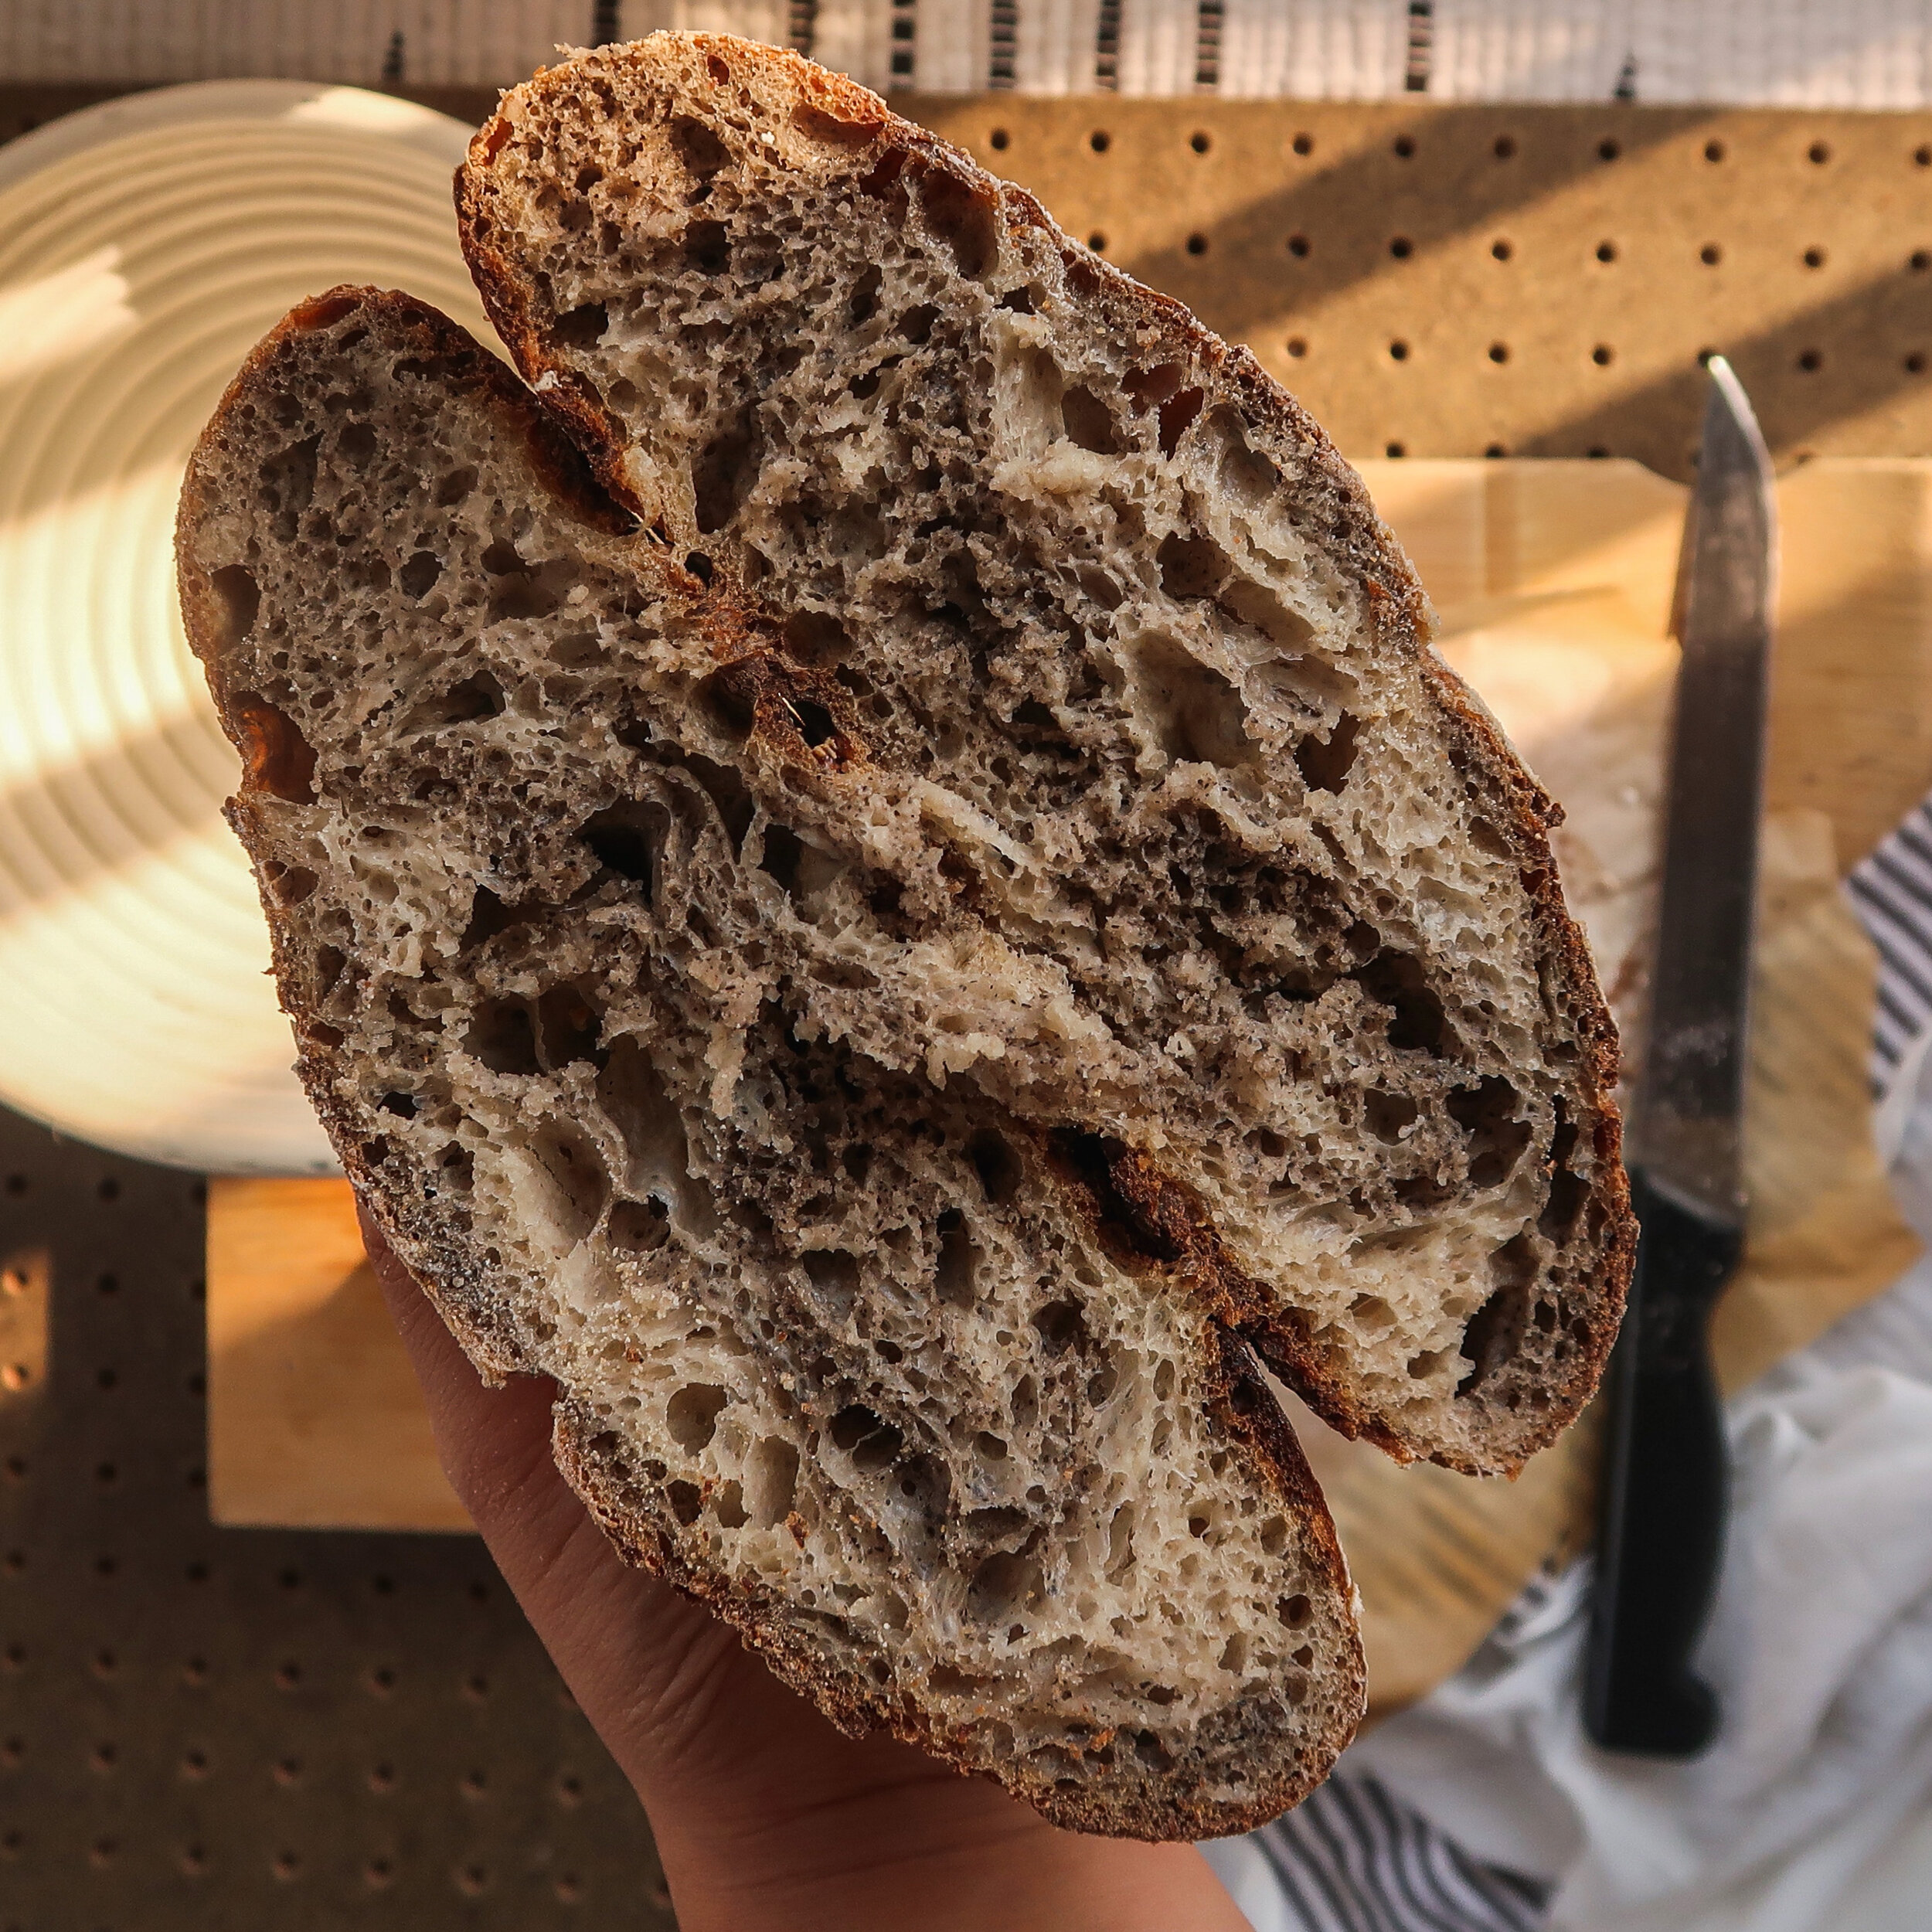
8 months - as my mind drifted off into the ether, i totally botched measuring flour and water. retracing my steps and using some intuition though, i think in the end this loaf turned out to be 85% bread,15% spelt, and 75% hydration. i’ve never used this much white flour in a loaf, and you can tell by the insanenly open crumb. i also followed @paris.starn update method: my first time using a side car and lamination and coil folds techniques. i think these new techniques also contributed to the crazy crumb. this loaf also had a scoring pattern that was way too ambitious…which probably didn’t let steam escape evenly. i need to stop introducing so many new variables in one loaf. im pleased with this crumb though.
Levain -- Levain is different than starter. Your starter is forever while your levain is temporary. Think of a levain as a temporary, off-shoot starter. Some bakers take a bit of their starter aside the night before they bake--a levain--and feed this levain a special diet that matches the same formula of flour of the bread that they’re going to make the next day. They then will add the levain directly to the dough. For example, you’re feeding your starter 1:1 ap:ww, but you want to make a loaf that is only 10% whole wheat. You would then feed your starter 9:1 ap: ww and add that to the dough instead.
Other bakers skip a levain and add their starter directly to their dough (e.g., me).
Gluten -- To put it simply, think of gluten as the protein bonds in flour. When you add water to flour and start to mix, you’ll start activating gluten bonds. In cakes and pastries, you want to inhibit gluten formation/chewy interior. You refrain from overmixing muffin batter, and you never want a chewy croissant. But in bread, you want to form strong gluten bonds to trap the CO2 released during proofing and in the oven. (Everything in moderation though--if the bonds are too strong, the bread will have a hard time rising.)
Bulk Fermentation -- The 3-4 hours you’ll wait during day 1 of baking before shaping.
Proofing -- The 12-18 hours overnight you’ll store your bread in the fridge after shaping.
Scoring -- the slashes/designs you’ll make right before the bread goes in the oven. Helps release steam properly.
How do I rehydrate my sourdough starter?
If you’ve participated in my PWYC Sourdough Starter Fundraiser for Farmworkers, you saved yourself a stressful 14 days, ~1.4kg flour, and ~1.4kg water of starting your own culture. I’ve sent you 1 oz (25g) of dehydrated starter. It should only take 3-4 days to reactivate your starter.
When I tested rehydrating my starter, I initially followed King Arthur Baking’s guide. I found their steps successful at first, but I ended up tweaking my reconstitution process. My starter ended up becoming active a lot faster. I started basing my decisions off intuition and smells. You can either follow King Arthur Baking’s guide or my own--which is directly based off my own experience.
Optional step zero: weigh your empty glass jar and write down its weight. This weight will be helpful when you start to measure how much starter you want to discard and carry over on Day 3. Once feeding your starter becomes more of a habit, you’ll find that you can just eyeball amounts to discard and carry over though.

day 1
1. Day 1, morning: In a glass jar, add 1 oz (~25g) dehydrated starter and 2 oz water. Mix.
The starter chips will not dissolve immediately. Over the next two to three hours, come back and mix it around. The chips will dissolve faster if you crush them into smaller pieces before adding water.
2. Day 1, afternoon: Once the chips dissolve, add 25 g all-purpose flour. Mix and cover. Turn your oven light on and store the starter in the oven for the next 24 hours.
The oven light creates a gently heated environment (around ~80-90 deg F). Once the oven becomes gently heated, you can turn the light off. Day 2, afternoon/evening: After 24 hours, you’ll see the starter become frothy. Do not discard any of it. Add 25 g all-purpose flour and 25 g water.
3. Turn your oven light on and store the starter in the oven for the next 24 hours. (Again you can turn the oven light off once the oven becomes gently heated.)
You can check up on its activity during the next 24 hours. You’ll see it rise and start to bubble. After 24 hrs, you should see marks along the sides that the starter has risen and fallen. The top of the starter should look like a meniscus.

day 2, frothy
4. Day 2, afternoon/evening: After 24 hours, you’ll see the starter become frothy. Do not discard any of it. Add 25 g all-purpose flour and 25 g water.

day 3, bubbly. this starter is past its peak. the top has fallen or looks like a meniscus.
5. Day 3, afternoon/evening: The starter should now be bubbly instead of frothy. If your starter is bubbly, you no longer need to store it in the oven. If your starter is frothy, continue storing in the oven. Discard all the starter except for 10-25 g. Feed starter 25 g all-purpose (ap) flour, 25 g whole wheat (ww) flour, and 50 g water. Wait 12 hrs.
If you do not have whole wheat flour, then 50g all purpose is fine. Whole wheat just contains more nutrients for the culture.
Over the next 6-8 hours, you should see the starter rise and peak (at 2-3x its original size). Start to get to know your starter: smell and inspect it.
6. Day 4, morning: Discard all the starter except 10-25 g. Feed starter 25 g all purpose (ap) flour, 25 g whole wheat (ww) flour, and 50 g water. Wait 12 hrs.
Yes. This is the same step. Over the next 6-8 hours, you should see the starter rise and peak (at 2-3x its original size). At its peak, it should smell yeast-like/bread-like.

ripe and ready! (you can tell by the domed top that it is at its peak!)
7. Day 4, evening: Since your starter has past its peak and now fallen, your starter should smell acidic/sour. If it smells sour, your starter is ready. You can start to feed the starter whatever diet of flour you would like now as long as the total amount of flour equals the total amount of water (100% hydration, see Vocabulary section). I normally just feed my starter 1:1 ap:ww and 100% hydration. For example, 10-25g starter is fed 25g ap, 25g ww, 50g water. I would introduce a new diet slowly though, so you don’t shock the starter.

float test: you should really only test a small amount of starter in your float test. so, this is overkill: i dumped all my starter into a bowl of water. (i was curious to see if it would all float even with its weight.) but i think this picture demonstrates beautifully that during a float test the amount/weight of starter you put in water doesn’t matter: if it’s ripe and active, it will float.
—There’s no harm in continuing to feed the starter every 12 hours (reserve 10-25g & feed 25 g ap, 25 g ww, and 50 g water) and hold off baking for the next few days. You’ll only be strengthening your starter in fact.
—If you want to change your feeding schedule from twice a day to once a day, now is the time to do so. I would recommend feeding the starter a higher ratio of all-purpose: whole wheat though (9:1), so that the starter grows slower.
—If you want to make sure your starter is ready to bake, complete a float test at its next peak. Gently scoop a little starter off the top, and drop it into a bowl of water. It should float.
—Troubleshooting? The golden answer is to CARRY OVER LESS STARTER (closer to 10g) when feeding. My thought behind this? You’re trying to get rid of whatever is nasty in the culture.
Your starter should always be quite thick after feeding. If it is still liquidy after day 4, then carry over closer to 10g when you feed it next.
On day 4, my reconstituted starter started to smell very alcoholic, meaning the starter was overly active. The starters’ yeast have consumed all of its food during alcohol fermentation, resulting in more ethanol. In order to fix the smell, I carried over less starter in order to get rid of the higher concentration of yeast that was overly active. Because whole wheat has more nutrients for the culture, I also started to feed the starter less whole wheat (so it would become less active). I fed it 90% ap and 10% ww or rye.
Everyone’s starter is a bit different depending on the water and flour they use. Your starter will end up diverging from its father John Dough naturally due to the flour and water you use! I’ve found starters to be quite resilient. As long as you feed it with clean hands once or twice a day, you’ll be fine. Trust me.
There’s a lot of breadmaking equipment. What should I invest in?
I started with absolutely no equipment, and I only started invested in more of the fancy tools when I realized sourdough was not just a fad in my life but a serious healing process that I was having with my food.
(Well, I guess I had one piece of equipment--a glass jar. I recommend that you grow your starter in a glass jar with a wide mouth and straight sides, which will make it easier to mix your starter with a spatula).
In March, I only bought two pieces of bread making equipment: a scale and a dutch oven. I believe my scale was ~$10 and my Lodge cast iron combo cooker (the cheap and cult dutch oven popularized by Tartine Bakery itself) was ~$40. If you have zero equipment like I did, I would recommend you start with these two. The scale ensures that you can measure ingredients in the metric system (much more accurate than U.S. customary). The dutch oven ensures that you create a hot and steamy environment while baking.
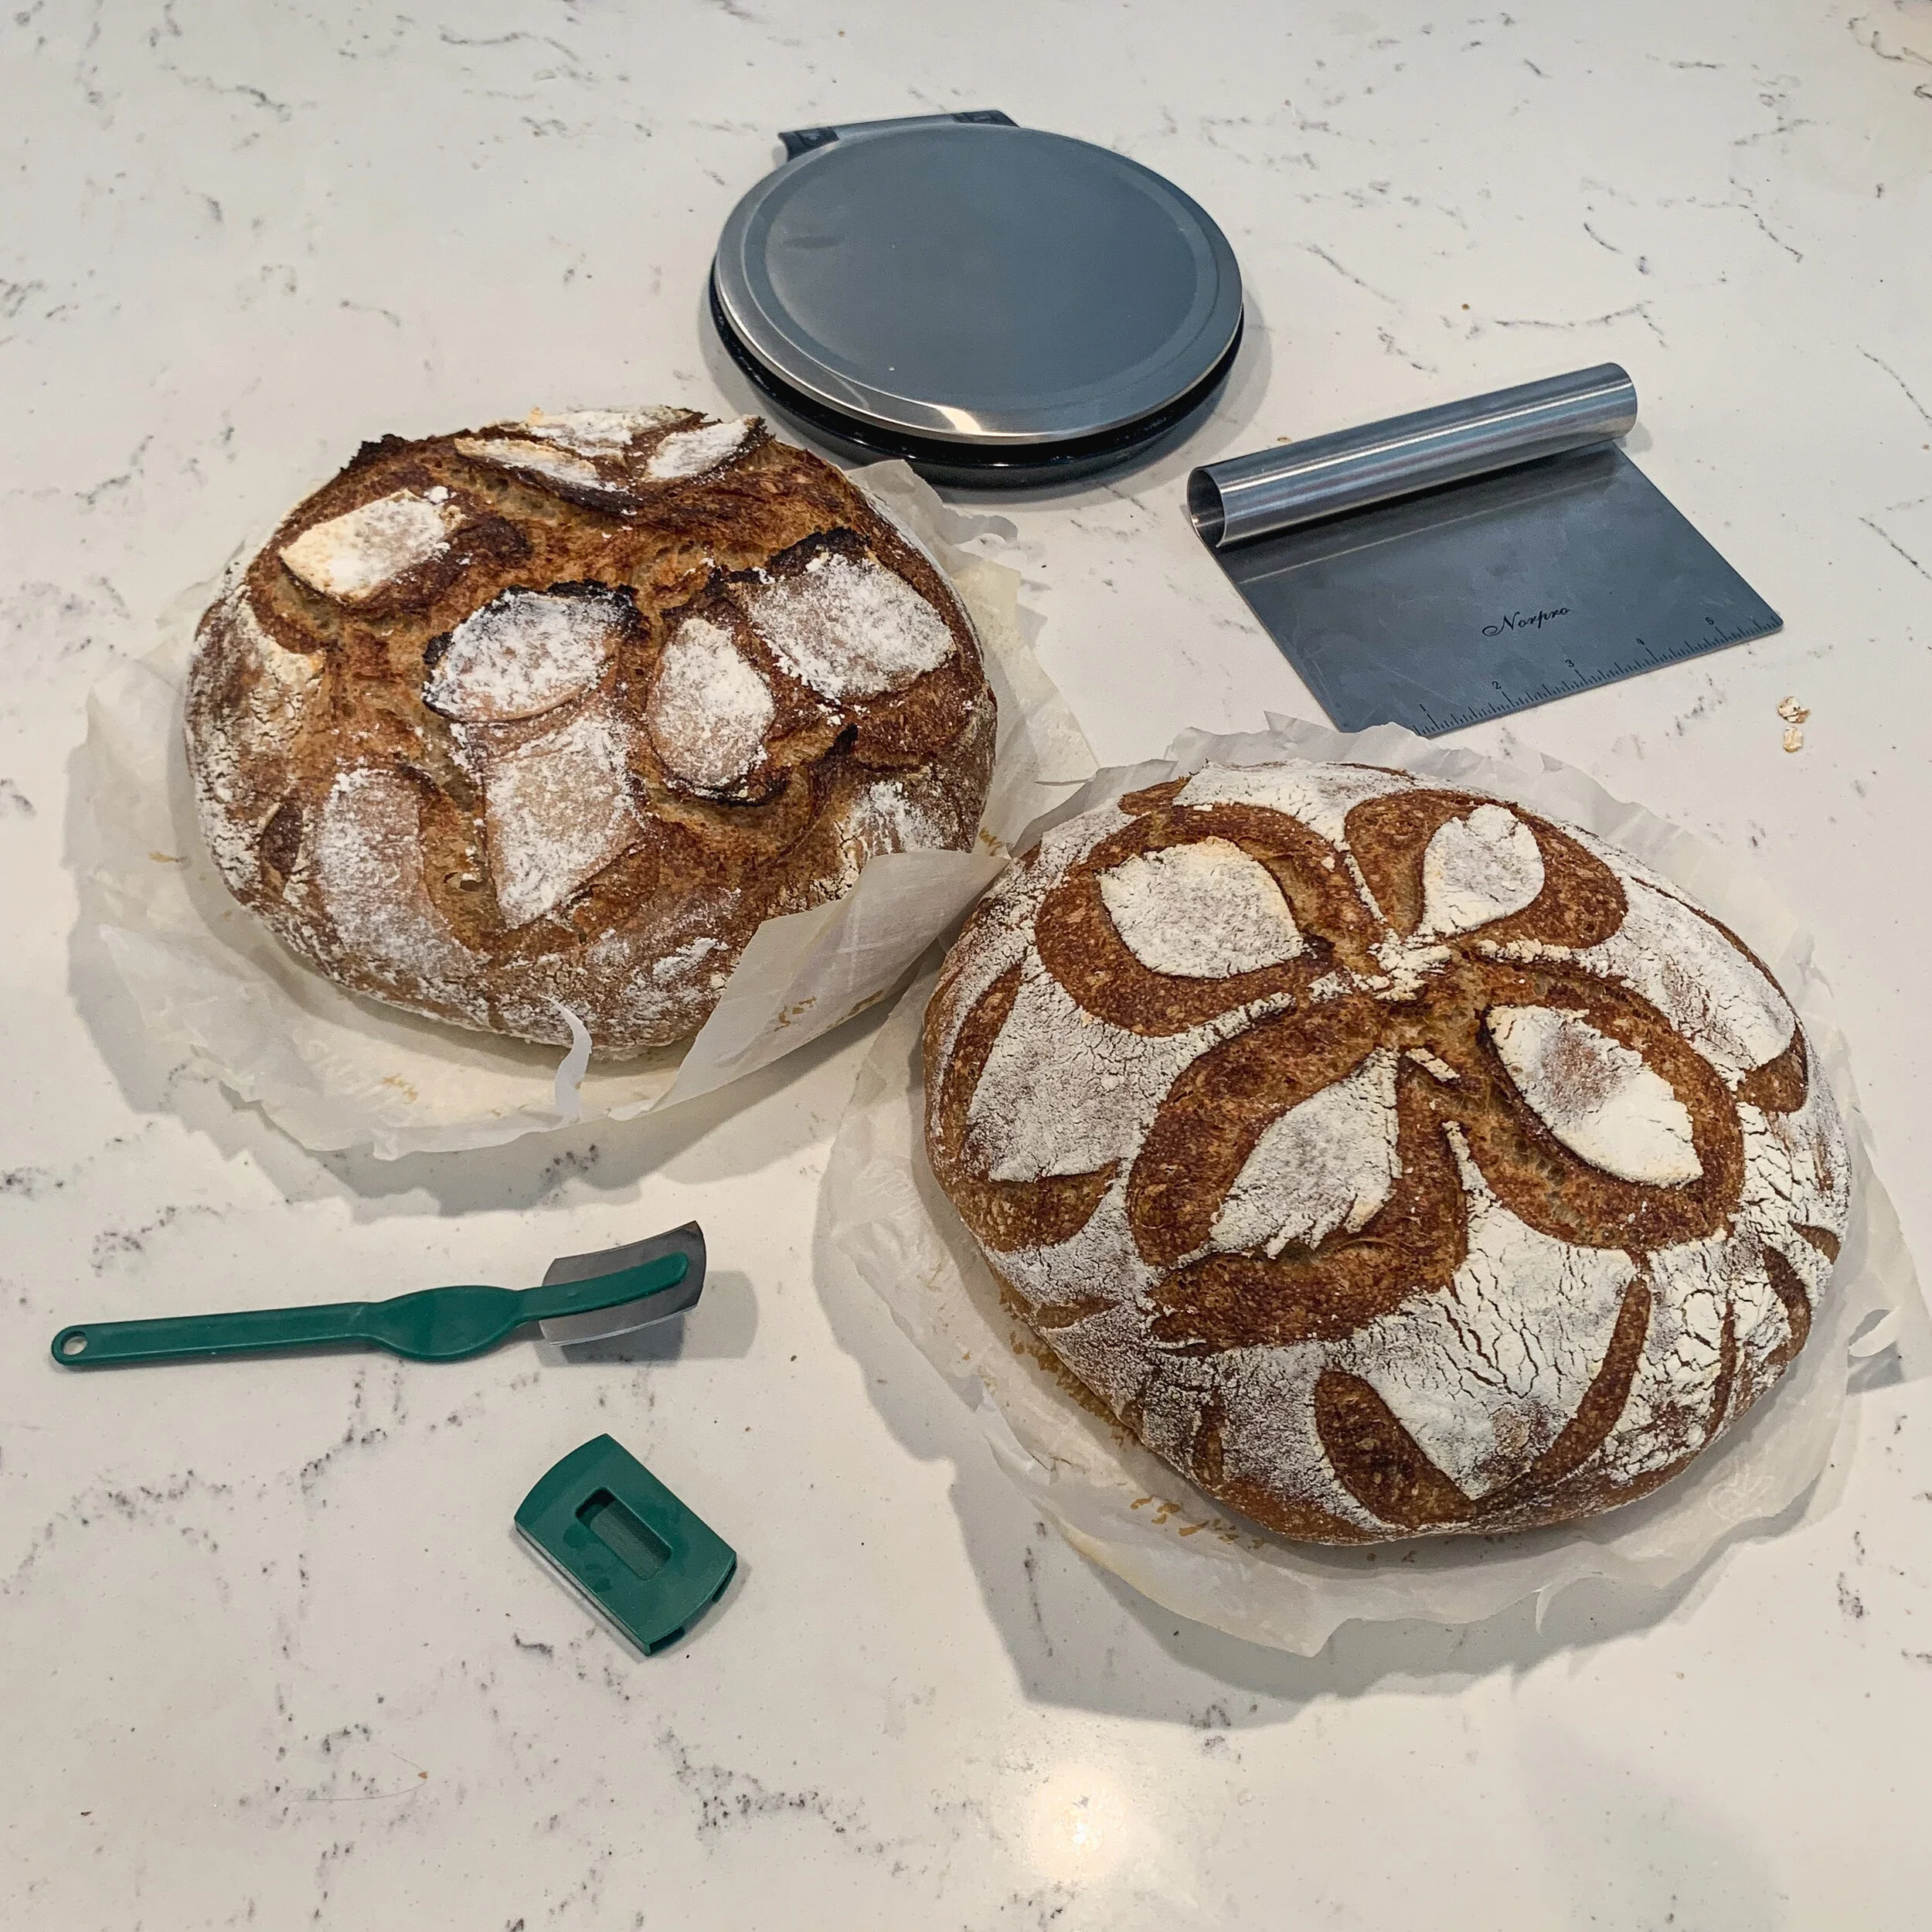
Do you already have a scale and dutch oven? Consider next investing in a dough scraper/bench knife (<$10) and rice flour (<$5). With a bench scraper, you will be able to handle the dough easier. Using rice flour to line your banneton/bowl ensures that your bread doesn’t stick to the banneton/bowl overnight.
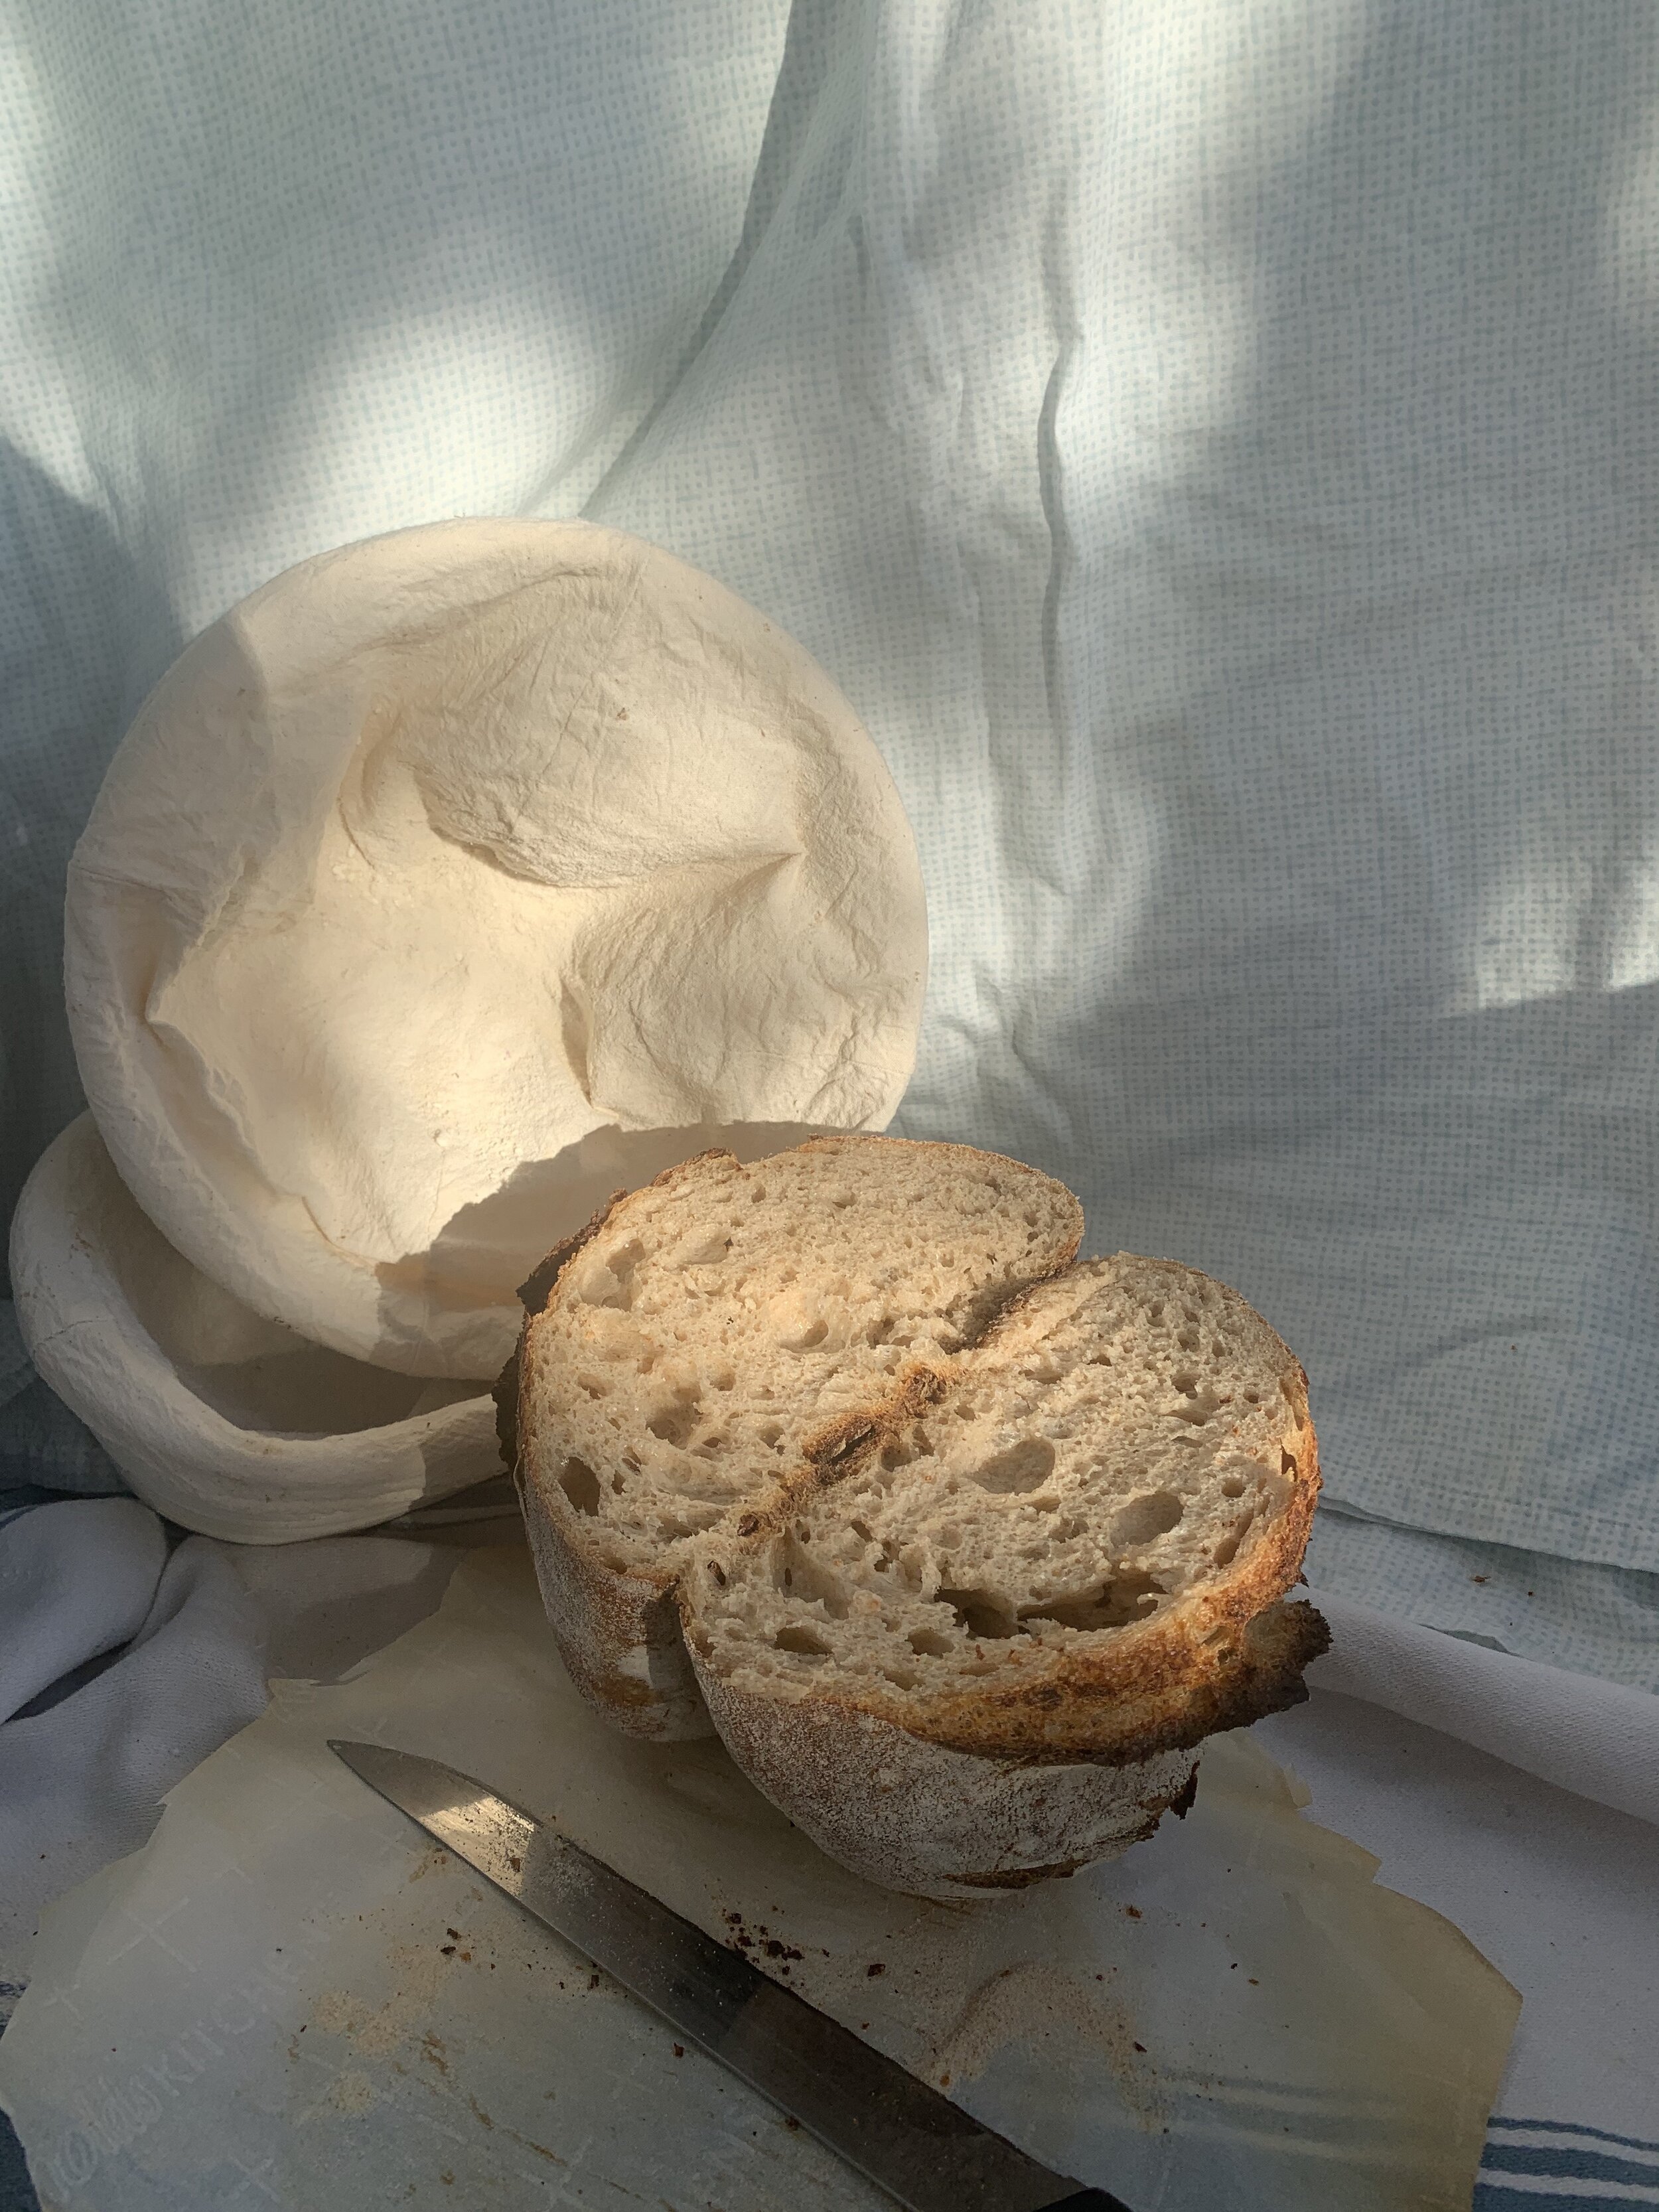
After you bake a few loaves, you can then consider buying: a bread lame (~$10) and bannetons (~$20). You’ll be able to design more intricate scoring patterns with a bread lame. A banneton will shape your bread better overnight, giving it better tension and aeration.
(I’m not including any links because I encourage you to check out your local kitchen supplies store. Your business means a lot to small business especially at this time.)
Substitutions:
Dough scraper/Bench knife = wet hands
Bread lame = razor blade, xacto knife
Bannetons/Bread basket = any kitchen bowl lined with a heavily floured towel
What sourdough recipe should I follow first?
I treasure Claire Saffitz’ guide on NYT cooking. It provides an easy-to-follow, no-knead method that is based on the Tartine method. I would follow this guide for your first few bakes. This is the guide that I have now memorized. She also has a highlight walkthrough on her IG highlights. Tartine’s country bread chapter is also a great resource, but it reads more like a textbook than a recipe. I linked the condensed recipe version, but the book chapter is much more extensive.
Along your sourdough journey (AFTER your first loaf), start to follow #sourdough and other sourdough hashtags (#flourwatersalt, #wildyeast, #breadscoring, etc,). They give good technique advice, but they are only helpful once you’ve been through the process yourself a few times (e.g., you can easily read percentage formulas and understand different bulk fermentation lingo). You’ll have far too high expectations if you follow these initially, and you’ll only be disappointed after you cut open your first loaf.
ALEX’S TIPS for your first bake:
I’m not a cult Claire Saffitz follower, but I would follow Claire’s instructions closely during your first time. I think Claire also sets good boundaries for a beginner: not exceeding 75-77% hydration or 30% whole wheat flour. If you’re feeling nervous, feel free to hold back 50g of water (2%) and use 10% whole wheat flour (100g). Don’t be mad at yourself if you have to keep checking back and forth. You’re learning a whole new skillset! Accept that your first time will be chaotic.
A loaf of bread is roughly 1 kg. You’ll be making 2 kg dough or two loaves of bread each time you bake. Most recipes call for making two loaves. I always make two because it doesn’t make sense for me to spend 72 hrs on one loaf, and two loaves means double the practice.
Set aside the entirety Saturday morning and afternoon and Sunday morning (or 1 ½ days at home).
Use good quality bread flour, not all-purpose, for your loaves. Bread flour has a higher protein content, so you’ll form gluten bonds more easily--giving you higher rise. Feed your starter bread flour instead of all-purpose the night before.
You should be intentional how you handle your dough from bulk fermentation onwards. During stretch-and-folds, you’ll want to create tension to strengthen the dough. Don’t just pull a corner and fold it over itself. Stretch the dough (so that you can feel for tension) and then fold it over itself.

sourdough after combining starter + autolyse + salt, ready for bulk fementation: from this point on, be gentle with dough
The bread can sense your fear when scoring. Just be quick and intentional with your cuts.
Wait 2-3 hours after oven before cutting. The crumb is still developing as it cools.
I store my loaf out for the first 4-5 days, crumbside down on a cutting board and covered with a towel.
Sourdough is a lot more forgiving than you think. I don’t set timers, but I just keep an eye on the clock. Do not worry if you’re feeding your starter 14 hours later (if you’re on a 2x/day feeding schedule) or 25 hours later (if you’re on a 1x/day feeding schedule). It’s okay if your cold proof in 20 hours instead of 16. Trust me: I’ve made a million mistakes and I hate following directions. All my breads have still tasted fine.
I’m done baking until next week. What do I with my starter now?
After your first bake, feed it again, leave it out for a couple hours, and then store it in the fridge until your next bake. The cold makes the culture go dormant.
While you can store your starter in the fridge for 2-3 weeks unfed, I would recommend taking it out once a week to feed it, let it rest for a couple hours, and then put it back in the fridge.

hooch after 1 month neglected in the fridge!
It’s OKAY if you see a blackish liquid on top of the starter after a week in the fridge. It’s called hooch, just a pool of the liquid that contains the alcohol that the yeast has created. It just means it’is hungry. Just pour it off.
When you decide to bake again, just take it out a few days before to feed 2x a day and wake it up.
What is discard? Do I just throw it away? (No!)
Discard is the 90% of starter that you won’t carry over during feeding. You’ll “create” discard every time you feed. It will most likely have passed its passed its peak. You can tell starter has passed its peak when: the center has fallen, it starts to look like a meniscus, it starts to smell sour, and it is much more liquidy.
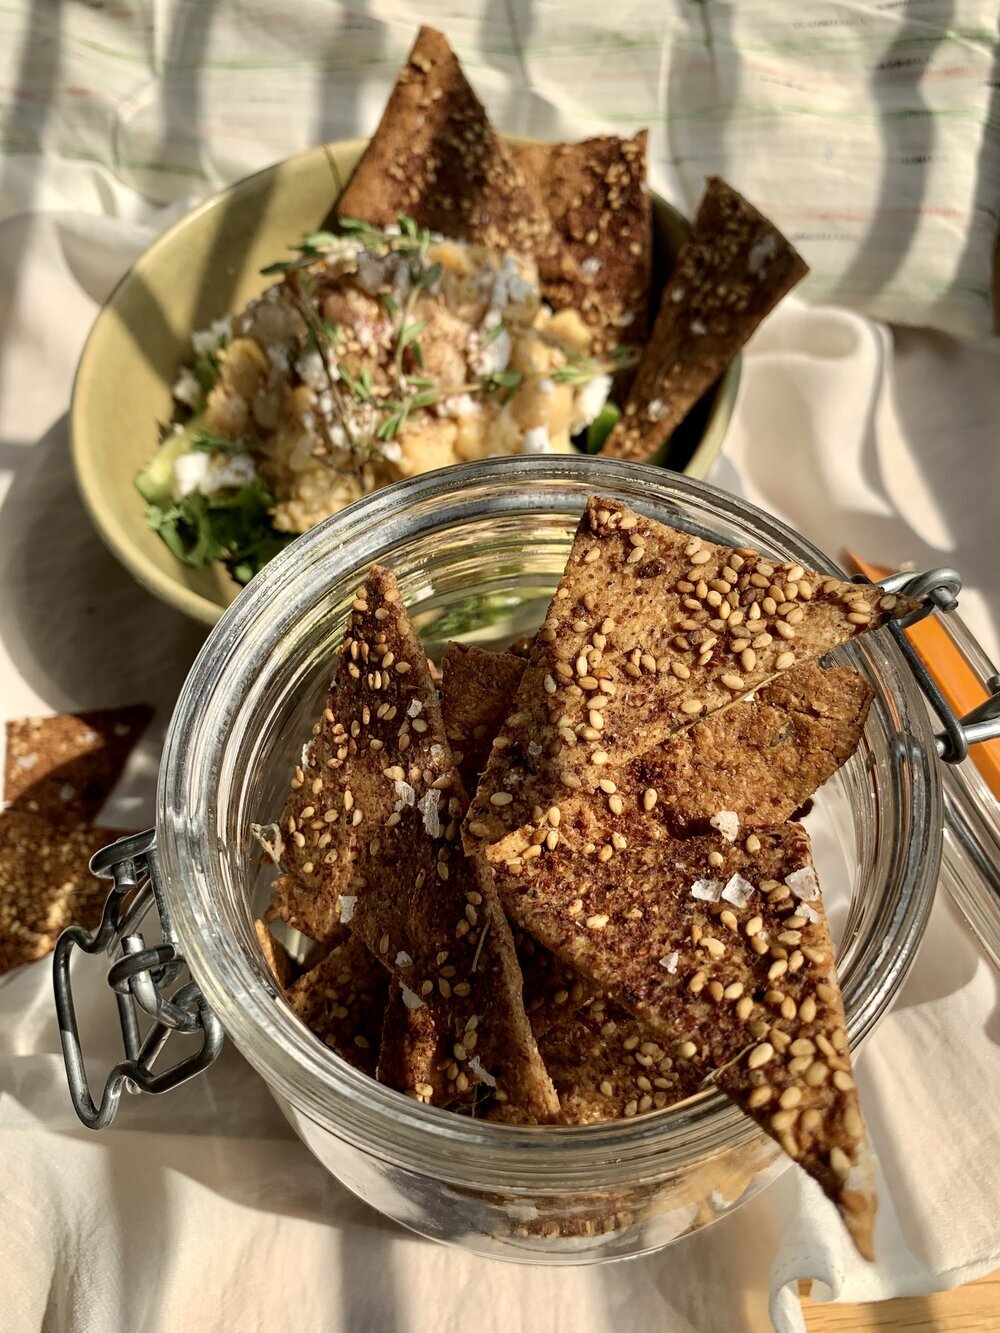
You can throw away your first few batches of discard when you are first rehydrating the starter. Once your starter is fully active (post-day 4), you can start saving your discard in a large container in the fridge! In my experience, it is good for up to month before it starts smelling really off. I find discard one of the beauties of sourdough because it can be repurposed into countless other recipes (while reducing food waste).
Good thing for you! I have three fully developed discard recipes: sourdough crackers, sourdough golden granola, and sourdough tempura. Otherwise, I follow #sourdoughdiscard to keep up on new trends and use King Arthur Baking’s discard recipe collection as a trusty resource.


How should I eat my sourdough?
Since sourdough has so much flavor and because I’m often experimenting with different grains or mix-ins, I like to taste my bread plain first and then with butter and salt first.
Throughout the week, you can try a variety of different toasts. Here’s 9 ways.
Not planning to eat both loaves? Slice and freeze one of them immediately. I know this sounds wrong to freeze freshly baked bread that you’ve tired over for 36 hours, but freezing immediately will maintain the bread’s moisture. When defrosting, quickly swipe/run the slice under running water. (Yes, running water for less than a sec). Then toast.
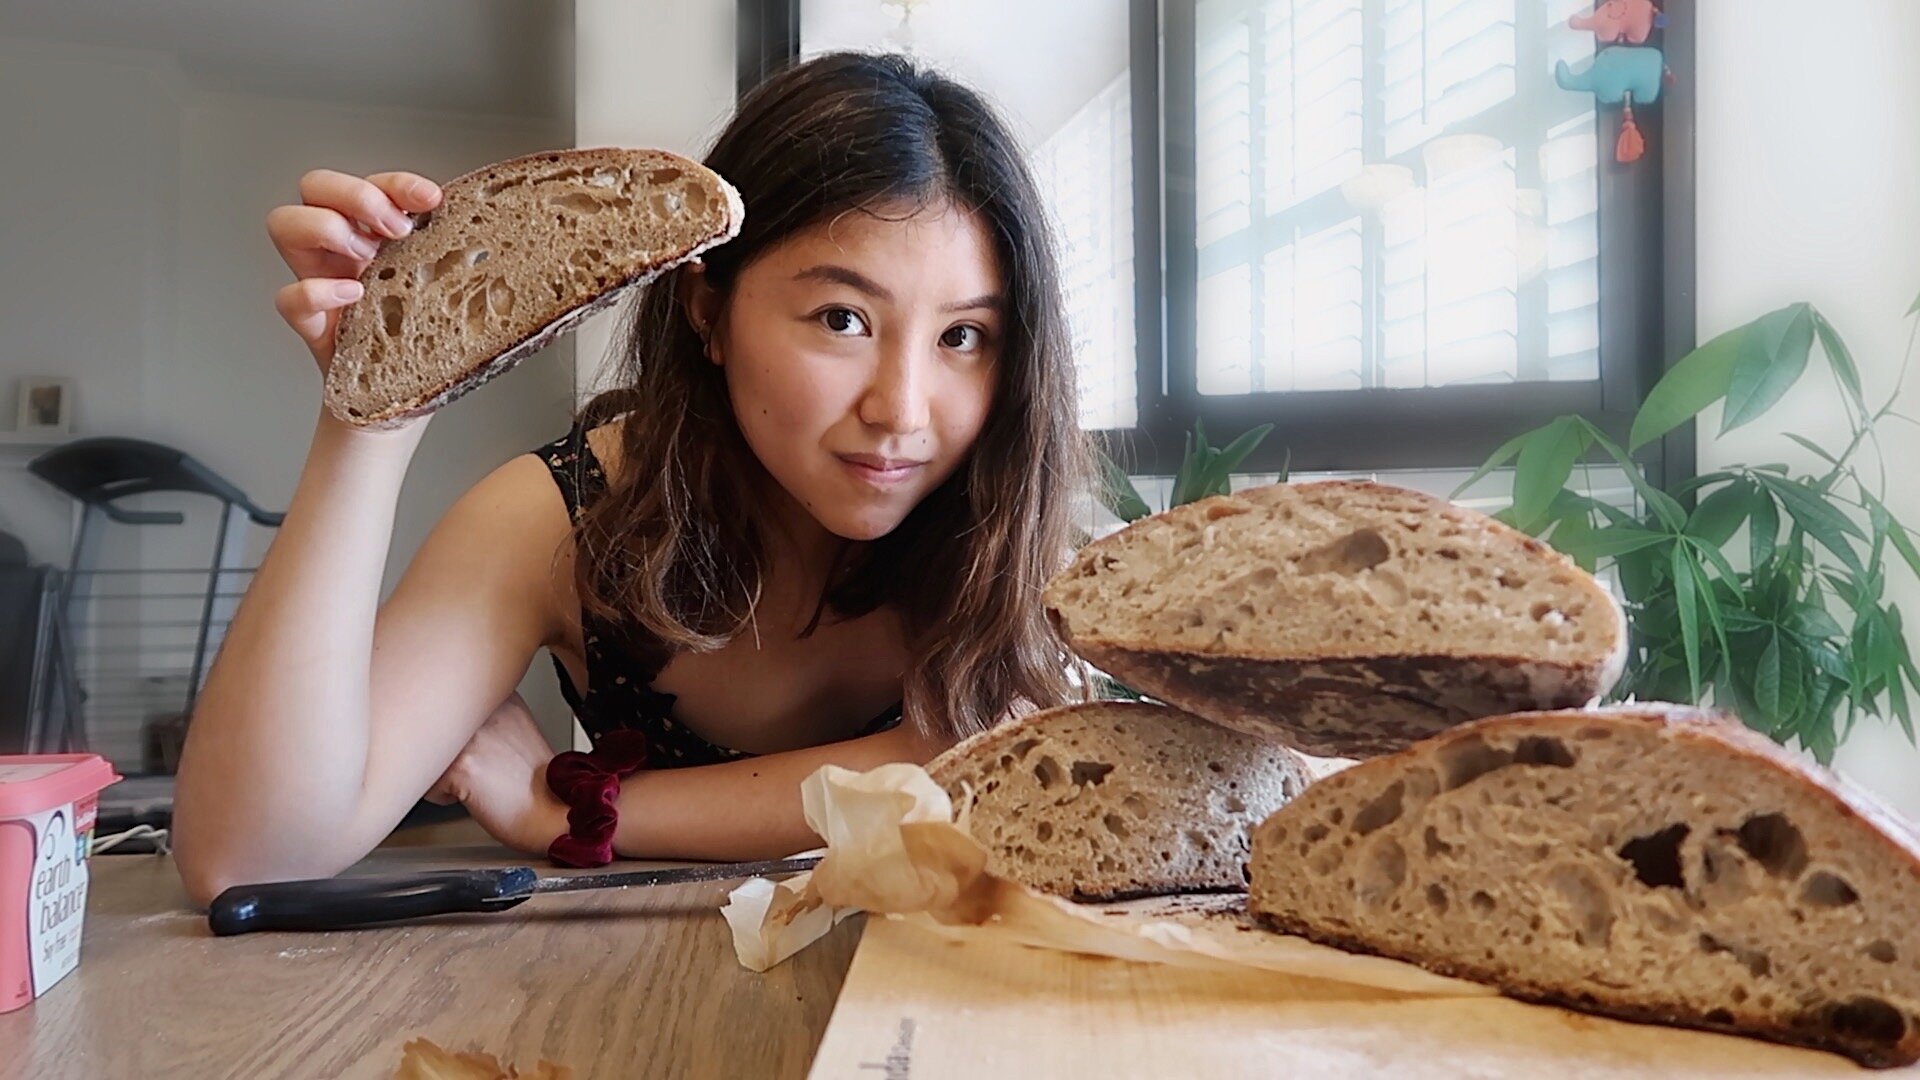
Please tag me @everythingalexcooks in your first loaf! I can’t wait to see John Dough’s brethren go worldwide. (Yes, you should definitely name your starter. Let me know, so I can add him/her/them to the family tree.)